Amarr elite combat pilot — the most Omega-ready character in the stable. Goal: Harbinger is the best ship right now at 60–100M ISK/hr. One Omega subscription activates the Zealot, Paladin, Guardian, Loki, and more — nearly all pre-trained to IV or V. The Paladin alone earns 200–400M ISK/hr. Every day on Alpha is wasted potential.
New to EVE? Read this first
ISK is EVE’s in-game currency (K = thousands, M = millions, B = billions).
Security space — shown as a number (0.0–1.0) next to every system name:
- High-sec (0.5–1.0): Police (CONCORD) protect you. Safe for new players.
- Low-sec (0.1–0.4): No police. Players can attack you freely. Better income.
- Null-sec (0.0): Player-controlled, most dangerous, highest income.
How to find mission agents: Business → Agents → Security. Filter by level (2, 3, or 4) and region. Pick an agent within a few jumps of your base. Run missions for the same corporation consistently — it builds standing (loyalty) which unlocks higher-level agents at that corp.
How Amarr lasers work: Lasers use crystals instead of regular ammo — crystals don’t get consumed, they just degrade over time and eventually break.
- Scorch: Long range, fires at zero capacitor cost, good tracking. The default. Always have this loaded.
- Conflagration: Very short range, maximum DPS, drains your capacitor fast. Only switch to this when a target is webbed to near-zero speed and sitting still — never as a default.
Where to buy: Amarr station (Domain region) or Jita 4-4 (The Forge). Set either as destination in your starmap. Amarr is convenient for this character since most mission agents will be in Amarr Empire space.
| Ship | Hull cost | ISK/hr | Best Activity |
|---|---|---|---|
| Executioner | ~300K | 10–20M | Belt ratting, learning tackle |
| Coercer | ~600K | 15–30M | Combat anomalies, belt ratting |
| Omen | ~4M | 35–60M | L2–3 missions, combat sites |
| Maller | ~6M | 30–55M | L2–3 missions (tankier Omen) |
| Harbinger | ~45M | 60–100M | L3–4 missions — best right now |
| Hurricane | ~40M | 55–90M | L3 missions, PvP (cross-trained) |
Alpha vs Omega
| State | Best Ship | Hull cost | ISK/hr | How to unlock |
|---|---|---|---|---|
| Right now (Alpha) | Harbinger | ~45M | 60–100M | Fly it today |
| Omega — best PvE | Paladin | ~1.6B | 200–400M | Subscribe Omega |
| Omega — PvP | Zealot | ~200M | 80–150M | Subscribe Omega |
| Omega — versatile | Loki | ~800M | 100–250M | Subscribe Omega |
| Omega — fleet | Guardian | ~230M | Invaluable | Subscribe Omega |
| Omega — battleships | Abaddon / Apocalypse | ~80M | 100–180M | Subscribe Omega |
xNightShadex has the highest Omega ceiling of any character here. The Paladin earns more in one hour than most characters earn in three. This is the priority Omega account.
Executioner
| **ISK/hr: 10–20M | Hull: ~300K | Total fit: ~11M** |
The learning ship. Nearly free — teaches the Amarr laser playstyle (range management, Scorch vs Conflagration, cap awareness) before risking expensive ships.
Where to go: High-sec asteroid belts (solar system map → right-click any belt → Warp To) or combat anomalies (Alt+P → Combat tab). Stay in 0.5+ security systems while learning.
Why fly this first: The Executioner teaches everything the Harbinger and Paladin use — same crystals, same orbit distances, same cap discipline. Learn it cheap.
[Executioner, Fast Tackle]
Small Focused Pulse Laser II x2

5MN Quad LiF Restrained Microwarpdrive
Warp Scrambler II
Stasis Webifier II

Damage Control II
Nanofiber Internal Structure II x2

Small Energy Burst Aerator I
Small Low Friction Nozzle Joints I x2

Ammo: Scorch S (default — cap-free) / Conflagration S (target webbed + stationary only)
| Module | Qty | ~Price |
|---|---|---|
| Small Focused Pulse Laser II | ×2 | 600K ea — 1.2M |
| 5MN Quad LiF Restrained Microwarpdrive | ×1 | 800K |
| Warp Scrambler II | ×1 | 1.5M |
| Stasis Webifier II | ×1 | 2M |
| Damage Control II | ×1 | 2.5M |
| Nanofiber Internal Structure II | ×2 | 1M ea — 2M |
| Rigs ×3 | ~100K ea — 300K | |
| Hull (Executioner) | 300K | |
| Total | ~11M ISK |
✅ LD can make: Executioner hull (BPO ~1.5M NPC), all three rigs.
Module guide (Amarr — read once):
- MWD (Microwarpdrive): Massively boosts speed. Deactivates when scrambled.
- Warp Scrambler: Stops target warping, kills their MWD.
- Stasis Webifier: Cuts target speed — makes them easier to hit.
- Scorch S: Fires at zero cap cost at 9–15 km. Always use this as your default.
- Conflagration S: Maximum DPS at point-blank. Drains cap fast. Only swap when target is webbed and nearly still.
PvP: MWD approach at an angle — never head-on or you overshoot. Scramble at 9 km. Web at 7 km. Orbit 5,000 m with Scorch S. If your cap bar is dropping, you switched to Conflagration too early — switch back.
Coercer
| **ISK/hr: 15–30M | Hull: ~600K | Total fit: ~15M** |
Eight lasers in a destroyer hull. Kills NPC frigates extremely fast — high site throughput makes up for low per-kill value.
Where to go: Combat anomalies (Alt+P → Combat tab) in any high-sec system. Open the scanner, run through every listed site, then move to the next system. Anomalies reset daily so they’re always available.
Why this over the Executioner: Eight guns vs two — roughly 4× the kill speed. Clears a full combat anomaly before the Executioner clears half.
[Coercer, Alpha DPS]
Small Focused Pulse Laser II x8

5MN Quad LiF Restrained Microwarpdrive
Warp Disruptor II

Heat Sink II x2
Damage Control II

Small Energy Burst Aerator I
Small Energy Locus Coordinator I x2

Ammo: Scorch S (default) / Conflagration S (close, target stopped)
| Module | Qty | ~Price |
|---|---|---|
| Small Focused Pulse Laser II | ×8 | 600K ea — 4.8M |
| 5MN Quad LiF Restrained Microwarpdrive | ×1 | 800K |
| Warp Disruptor II | ×1 | 1.5M |
| Heat Sink II | ×2 | 2M ea — 4M |
| Damage Control II | ×1 | 2.5M |
| Rigs ×3 | ~100K ea — 300K | |
| Hull (Coercer) | 600K | |
| Total | ~15M ISK |
✅ LD can make: Coercer hull (BPO ~2M NPC), all three rigs.
PvE: Orbit at 7,000 m with Scorch S. Eight lasers with two Heat Sinks produce exceptional DPS for a destroyer.
PvP: Warp Disruptor (point) at 24 km. Orbit 7,000 m — never sit at point-blank or tracking fails. Keep moving. Very fragile — do not tank hits, stay at range.
Omen
| **ISK/hr: 35–60M | Hull: ~4M | Total fit: ~38M** |
Fast armour cruiser with strong DPS bonus. Clears level 2–3 mission rooms quickly. Good stepping stone before the Harbinger.
Where to go: Level 2–3 security mission agents (Business → Agents → Security → Level 2 or 3). Amarr Empire has plenty of agents near the major trade hub. Level 2 agents need no standing. Level 3 need ~3.0 standing — earned by completing ~20–30 level 2 missions for that same corporation.
Why missions: Missions pay guaranteed ISK per completion plus bounties inside. More predictable than belt ratting.
[Omen, Solo PvP]
Medium Pulse Laser II x5

50MN Quad LiF Restrained Microwarpdrive
Warp Scrambler II
Stasis Webifier II

1600mm Rolled Tungsten Compact Plates
Damage Control II
Heat Sink II x2
Medium Ancillary Armor Repairer  (load: Nanite Repair Paste)

Medium Energy Burst Aerator I
Medium Trimark Armor Pump I x2

Drones: Hobgoblin II x5
Ammo: Scorch M (kite 15–25 km) / Conflagration M (target stopped)
| Module | Qty | ~Price |
|---|---|---|
| Medium Pulse Laser II | ×5 | 1.5M ea — 7.5M |
| 50MN Quad LiF Restrained Microwarpdrive | ×1 | 3M |
| Warp Scrambler II | ×1 | 1.5M |
| Stasis Webifier II | ×1 | 2M |
| 1600mm Rolled Tungsten Compact Plates | ×1 | 2M |
| Damage Control II | ×1 | 2.5M |
| Heat Sink II | ×2 | 2M ea — 4M |
| Medium Ancillary Armor Repairer | ×1 | 2M |
| Rigs ×3 | 200–400K ea — 1M | |
| Hobgoblin II | ×5 | 300K ea — 1.5M |
| Nanite Repair Paste ×100 | 7M | |
| Hull (Omen) | 4M | |
| Total | ~38M ISK |
✅ LD can make: Omen hull (BPO ~5M NPC), all three rigs — saves ~1.5M per fit.
PvE: Orbit at 10,000 m with Scorch M. Cycle lasers through targets. Ancillary rep on a controlled pulse. Drones on NPC frigates.
PvP: MWD approach at angle. Scramble at 9 km, web at 10 km, orbit 7,000 m with Scorch M. Ancillary rep bursts when armour drops. Drones on tackle frigates. Conflagration M only when target is completely stationary.
Maller
| **ISK/hr: 30–55M | Hull: ~6M | Total fit: ~40M** |
The tankier Omen — one less laser, twice the armour buffer. Slightly slower site clears offset by fewer ship losses.
Where to go: Same level 2–3 mission agents as the Omen. Use this over the Omen when running harder content or learning a new mission type — the extra armour gives more room for mistakes.
Why choose this over the Omen: The Maller is more forgiving. If you’re still learning missions or facing NPCs that hit harder, take the Maller. If you’re comfortable, take the faster Omen.
[Maller, Armour Tank]
Medium Pulse Laser II x4

50MN Quad LiF Restrained Microwarpdrive
Warp Scrambler II
Stasis Webifier II

1600mm Rolled Tungsten Compact Plates x2
Damage Control II
Heat Sink II
Medium Ancillary Armor Repairer  (load: Nanite Repair Paste)

Medium Energy Burst Aerator I
Medium Trimark Armor Pump I x2

Drones: Hobgoblin II x5
Ammo: Scorch M / Conflagration M
| Module | Qty | ~Price |
|---|---|---|
| Medium Pulse Laser II | ×4 | 1.5M ea — 6M |
| 50MN Quad LiF Restrained Microwarpdrive | ×1 | 3M |
| Warp Scrambler II | ×1 | 1.5M |
| Stasis Webifier II | ×1 | 2M |
| 1600mm Rolled Tungsten Compact Plates | ×2 | 2M ea — 4M |
| Damage Control II | ×1 | 2.5M |
| Heat Sink II | ×1 | 2M |
| Medium Ancillary Armor Repairer | ×1 | 2M |
| Rigs ×3 | 200–400K ea — 1M | |
| Hobgoblin II | ×5 | 300K ea — 1.5M |
| Nanite Repair Paste ×100 | 7M | |
| Hull (Maller) | 6M | |
| Total | ~40M ISK |
✅ LD can make: Maller hull (BPO ~6M NPC), all three rigs.
PvP: Same as the Omen — scramble 9 km, web, orbit 7,000 m with Scorch M. Double armour plate gives significantly more buffer. Use when the target hits hard and you want margin for error.
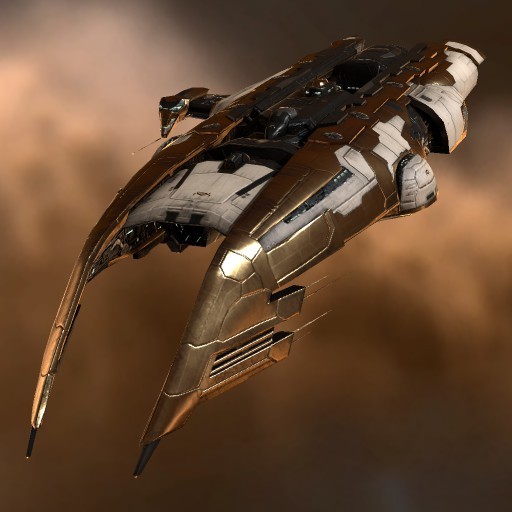
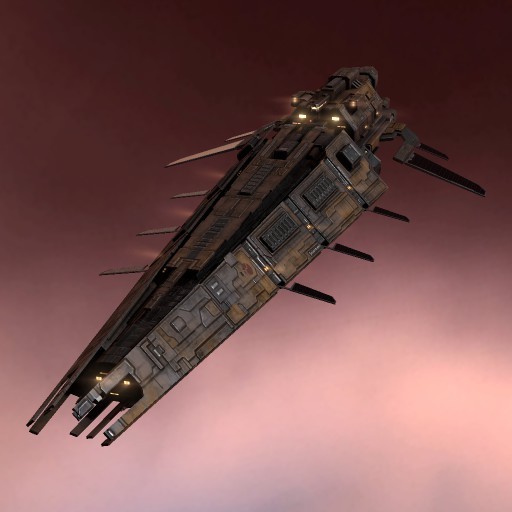
Harbinger

| **ISK/hr: 60–100M | Hull: ~45M | Total fit: ~82M** |
The primary ISK earner until Omega. Level 3 missions comfortably, level 4 missions with care. Five medium lasers plus missile secondary and heavy drones.
Where to go: Level 3–4 security mission agents in Amarr Empire space (Domain, Tash-Murkon, Khanid regions all have good agents near Amarr station). For level 3: need ~3.0 standing. For level 4: need ~5.0 standing — build this by running level 3 missions for the same corporation consistently. Each level 3 mission pays ~5–15M ISK plus bounties. A full session of L3 missions in the Harbinger earns 60–100M/hr.
Why this is the priority ship: At ~82M total fit, it earns back its own cost in roughly 1 hour. Every session in this ship banks meaningful ISK toward Omega.
[Harbinger, Solo PvP / Fleet]
Medium Pulse Laser II x5
Heavy Missile Launcher I x2

50MN Quad LiF Restrained Microwarpdrive
Warp Disruptor II
Medium Shield Extender II
Invulnerability Field II

1600mm Rolled Tungsten Compact Plates
Damage Control II
Heat Sink II x2
Medium Ancillary Armor Repairer  (load: Nanite Repair Paste)

Medium Energy Burst Aerator I x2
Medium Trimark Armor Pump I

Drones: Ogre I x3 + Hobgoblin II x2
Ammo: Scorch M (default) / Conflagration M (stopped target) / Scourge Heavy Missile
| Module | Qty | ~Price |
|---|---|---|
| Medium Pulse Laser II | ×5 | 1.5M ea — 7.5M |
| Heavy Missile Launcher I | ×2 | 200K ea — 400K |
| 50MN Quad LiF Restrained Microwarpdrive | ×1 | 3M |
| Warp Disruptor II | ×1 | 1.5M |
| Medium Shield Extender II | ×1 | 1.5M |
| Invulnerability Field II | ×1 | 3M |
| 1600mm Rolled Tungsten Compact Plates | ×1 | 2M |
| Damage Control II | ×1 | 2.5M |
| Heat Sink II | ×2 | 2M ea — 4M |
| Medium Ancillary Armor Repairer | ×1 | 2M |
| Rigs ×3 | 200–400K ea — 1M | |
| Ogre I | ×3 | 100K ea — 300K |
| Hobgoblin II | ×2 | 300K ea — 600K |
| Nanite Repair Paste ×100 | 7M | |
| Hull (Harbinger) | 45M | |
| Total | ~82M ISK |
✅ LD can make: Harbinger hull (BPO ~45M NPC — one-time, unlimited use, saves ~10M per hull at ME10), Heavy Missile Launcher I ×2, Ogre I drones, all three rigs.
PvE: Orbit at 15,000 m. Scorch M fires cap-free at this range. Missiles hit secondary targets. Drones on NPC frigates. Switch to Conflagration M only when a target is orbiting slowly right next to you.
PvP: MWD approach. Disruptor at 24 km. Orbit 10,000–15,000 m with Scorch M — Amarr laser sweet spot. Missiles on secondary targets. Drones on tackle frigates. Invuln field always on. Ancillary rep bursts when armour drops.
Hurricane
| **ISK/hr: 55–90M | Hull: ~40M | Total fit: ~72M** |
Cross-trained Minmatar battlecruiser. Full Minmatar BC V and Medium Projectile V — everything is T2 capable. An alternative when Harbinger is being repaired or for content that favours autocannons over lasers.
Where to go: Same level 3 mission agents as the Harbinger, or medium combat anomalies. Autocannons handle every NPC faction with the right ammo — Phased Plasma for armour-tanked NPCs, EMP for shields.
[Hurricane, Autocannon Brawler]
425mm AutoCannon II x6
Assault Missile Launcher II x2

50MN Quad LiF Restrained Microwarpdrive
Warp Disruptor II
Medium Shield Extender II
Invulnerability Field II

Damage Control II
Gyrostabilizer II x2
Nanofiber Internal Structure II x2

Medium Core Defense Field Extender I x2
Medium Projectile Collision Accelerator I

Drones: Warrior II x5
Ammo: Phased Plasma M (brawl 0–5 km) / Barrage M (kite 15 km)
| Module | Qty | ~Price |
|---|---|---|
| 425mm AutoCannon II | ×6 | 2M ea — 12M |
| Assault Missile Launcher II | ×2 | 400K ea — 800K |
| 50MN Quad LiF Restrained Microwarpdrive | ×1 | 3M |
| Warp Disruptor II | ×1 | 1.5M |
| Medium Shield Extender II | ×1 | 1.5M |
| Invulnerability Field II | ×1 | 3M |
| Damage Control II | ×1 | 2.5M |
| Gyrostabilizer II | ×2 | 2M ea — 4M |
| Nanofiber Internal Structure II | ×2 | 1M ea — 2M |
| Rigs ×3 | 200–300K ea — 700K | |
| Warrior II | ×5 | 250K ea — 1.25M |
| Hull (Hurricane) | 40M | |
| Total | ~72M ISK |
✅ LD can make: Hurricane hull (BPO ~50M NPC), all three rigs.
PvP: Disruptor 24 km. Brawl at 500 m with Phased Plasma M or kite at 15,000 m with Barrage M — decide before engaging. Six ACs deal 550+ DPS.
Upgrade Path
Omega Subscription — Activates Everything Instantly
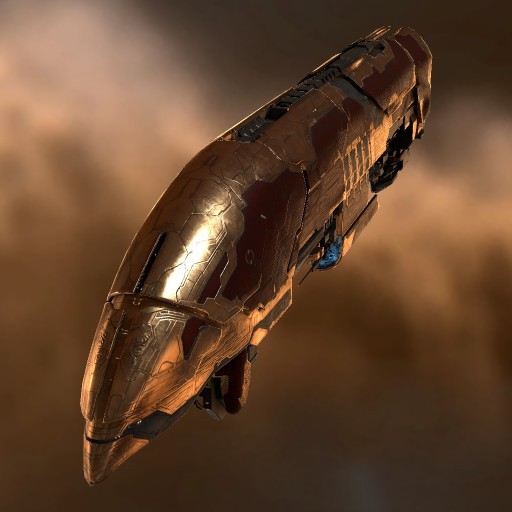
Zealot — 80–150M ISK/hr
| **Hull: ~200M (T2 Heavy Assault Cruiser) | Total fit: ~235M** |
Level 4 missions and null-sec anomalies. Same laser playstyle as the Harbinger, but the T2 HAC hull bonus makes it significantly faster and tougher.
Where to go: Level 4 mission agents (need ~5.0 standing — earn this running Harbinger L3 missions before Omega). Also: NPC null-sec combat anomalies (Syndicate, Curse, Stain) for 80–150M/hr with no standing requirement. Entry route: same as Vagabond — fly low-sec to null-sec entry gates.
[Zealot, Solo PvP / L4 Missions]
Medium Pulse Laser II x4

50MN Quad LiF Restrained Microwarpdrive
Warp Scrambler II
Stasis Webifier II
Medium Shield Extender II

1600mm Rolled Tungsten Compact Plates
Damage Control II
Heat Sink II x2
Medium Ancillary Armor Repairer

Medium Energy Burst Aerator I x2
Medium Trimark Armor Pump I

Drones: Hobgoblin II x5
Ammo: Scorch M (kite 15–20 km) / Conflagration M (stopped target)
| Module | Qty | ~Price |
|---|---|---|
| Medium Pulse Laser II | ×4 | 1.5M ea — 6M |
| 50MN Quad LiF Restrained Microwarpdrive | ×1 | 3M |
| Warp Scrambler II | ×1 | 1.5M |
| Stasis Webifier II | ×1 | 2M |
| Medium Shield Extender II | ×1 | 1.5M |
| 1600mm Rolled Tungsten Compact Plates | ×1 | 2M |
| Damage Control II | ×1 | 2.5M |
| Heat Sink II | ×2 | 2M ea — 4M |
| Medium Ancillary Armor Repairer | ×1 | 2M |
| Rigs ×3 | 200–400K ea — 1M | |
| Hobgoblin II | ×5 | 300K ea — 1.5M |
| Nanite Repair Paste ×100 | 7M | |
| Hull (Zealot — T2 HAC) | 200M | |
| Total | ~235M ISK |
T2 hull — no BPO. ✅ LD can make: all three rigs only. Hull is the main cost.
Orbit 15,000 m with Scorch M cap-free. Same principle as the Omen but significantly better tank and damage. Kills cruisers, BCs, and poorly-fitted battleships solo.
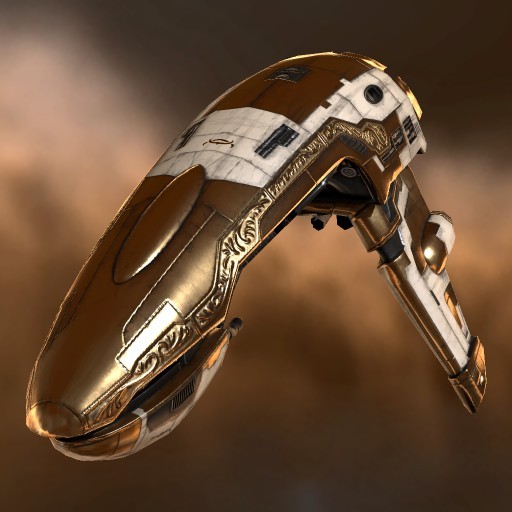
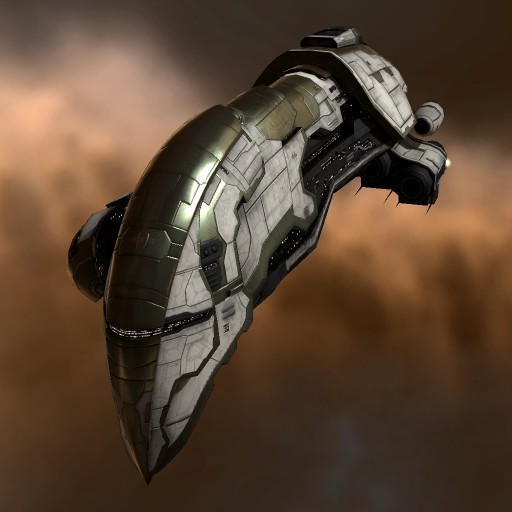
Paladin — 200–400M ISK/hr
| **Hull: ~1.6B (T2 Marauder) | Total fit: ~1.72B** |
The primary ISK printer. Level 4 missions with Bastion Module looping. The best PvE battleship in the game. This is the reason to prioritise Omega — it earns more in one hour than most characters earn in three.
Where to go: Level 4 security mission agents in Amarr Empire space. You need ~5.0 standing to access a level 4 agent — build this with the Harbinger first. Once there, each level 4 mission pays 20–50M ISK plus 50–200M in bounties and loot per room. At 200–400M/hr, the 1.72B fit cost pays back inside 5–10 hours.
How Bastion works: Activate the Bastion Module — for 60 seconds your tank and damage bonuses increase massively and you cannot be tackled (scrambled or webbed). Shoot everything in the room. When Bastion expires, reposition if needed, reactivate. Loop this through the entire mission.
[Paladin, Level 4 Missions]
Mega Pulse Laser II x4
Bastion Module I

100MN Quad LiF Restrained Microwarpdrive
Cap Recharger II x2
Sensor Booster II

1600mm Rolled Tungsten Compact Plates x2
Energized Adaptive Nano Membrane II x2
Damage Control II
Heat Sink II x2
Large Armor Repairer II

Large Energy Burst Aerator I x2
Large Trimark Armor Pump I

Drones: Ogre II x5
Ammo: Scorch L (default — fires at zero cap, 40+ km reach) / Conflagration L (close stationary targets)
| Module | Qty | ~Price |
|---|---|---|
| Mega Pulse Laser II | ×4 | 5M ea — 20M |
| Bastion Module I | ×1 | 55M |
| 100MN Quad LiF Restrained Microwarpdrive | ×1 | 5M |
| Cap Recharger II | ×2 | 1M ea — 2M |
| Sensor Booster II | ×1 | 2M |
| 1600mm Rolled Tungsten Compact Plates | ×2 | 2M ea — 4M |
| Energized Adaptive Nano Membrane II | ×2 | 4M ea — 8M |
| Damage Control II | ×1 | 2.5M |
| Heat Sink II | ×2 | 2M ea — 4M |
| Large Armor Repairer II | ×1 | 6M |
| Rigs ×3 | 500K ea — 1.5M | |
| Ogre II | ×5 | 600K ea — 3M |
| Hull (Paladin — T2 Marauder) | 1.6B | |
| Total | ~1.72B ISK |
T2 Marauder — no BPO. ✅ LD can make: all three rigs only. At 200–400M/hr, this ship pays back inside 5–10 hours of missions.
Activate Bastion → shoot everything at 40+ km with Scorch L → Bastion expires after 60 sec → reposition → reactivate. During Bastion you cannot be scrambled — you are completely safe from tackles.
Also Unlocked On Omega
| Ship | Hull cost | ISK/hr | Activity |
|---|---|---|---|
| Retribution / Vengeance | ~35M | 30–60M | Solo assault frigates, PvP roaming |
| Crusader / Malediction | ~65M | Fleet loot | Bubble-immune interceptors |
| Sacrilege | ~210M | 80–130M | Heavy missile HAC, PvE and PvP |
| Guardian | ~230M | Invaluable to fleet | Logistics — keeps fleets alive |
| Absolution / Damnation | ~350M | Fleet loot + command bonus | Fleet booster + DPS |
| Loki | ~800M | 100–250M | Reconfigure for any role — scanning, PvP, ratting |
| Apocalypse / Armageddon / Abaddon | ~80M | 100–180M | T1 BSs with T2 large lasers |