Four pilots. Each one built for something different. Read in order — top is who to focus on first.
Priority Order — Who to Play and Why
| Priority | Character | Focus | Why First |
|---|---|---|---|
| 1 | xNightShadex | Elite PvP + Level 4 ISK | Most developed pilot. Paladin prints ISK. Loki, Guardian, Absolution — everything is unlocked. |
| 2 | Lady Damnation | Manufacturing ISK | Makes money while logged off. Industry 5 + Hauler 5 = passive income. Start her jobs, log out. |
| 3 | chronicbomb | PvP roaming | Veteran combat pilot. Hurricane, Vagabond, Rapier — ready to fight. One train from Sleipnir. |
| 4 | Screams Eternal | Train her up | Solid missile foundation but needs a queue. Run level 2 missions while she trains. |
Table of Contents
- xNightShadex — Elite Specialist
- Lady Damnation — Industry & Hauling
- chronicbomb — Combat Veteran
- Screams Eternal — Missile Pilot in Training
- Ammo & Market Guide
xNightShadex
| Race | Amarr — Khanid |
| Security Status | +2.34 — high-sec clean |
| Current Ship | Hurricane |
| Best At | Level 4 missions, fleet logistics, T3 PvP, fleet command, capital ships |
xNightShadex is an elite multi-role pilot who has spent years training into the best ships in the game. Every energy turret and projectile turret is maxed at every ship size. His armour compensations are all at 5. He has Logistics Cruisers 5, Marauders 4, T3 Cruiser fully trained, and Cynosural Field Theory 5 — making him a cyno pilot for capital fleets. He is one skill away from flying a dreadnought.
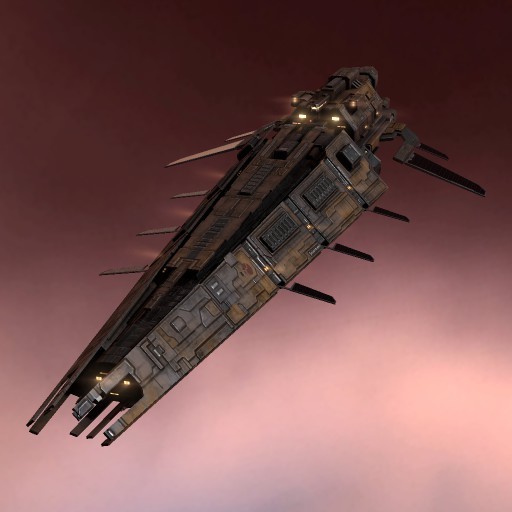
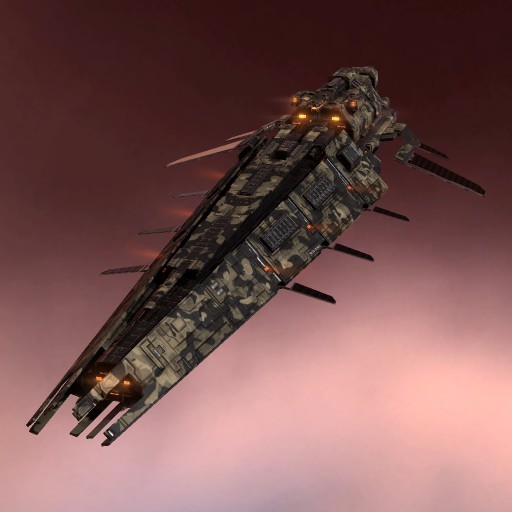
Paladin — Level 4 Mission Farmer
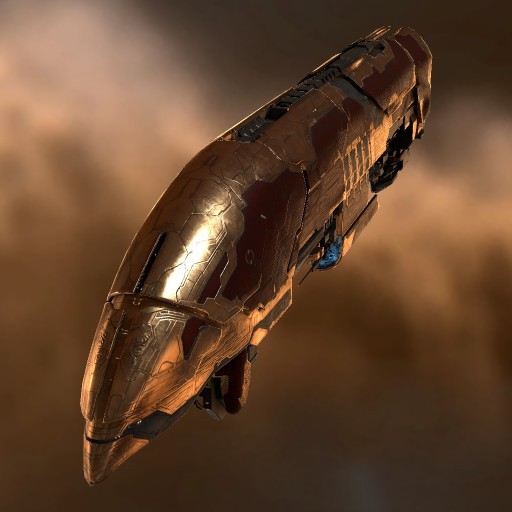
Paladin — Amarr Marauder (T2)
The Fit
[Paladin, xNightShadex L4 Missions]

HIGH SLOTS
Mega Pulse Laser II             x4
Bastion Module I
Large Micro Jump Drive

MID SLOTS
Cap Booster II                  (Navy Cap Booster 800 — carry 20+)
Tracking Computer II            (Optimal Range Script loaded)
Sensor Booster II               (Scan Resolution Script)

LOW SLOTS
Large Armor Repairer II         x2
Armor Explosive Hardener II
Armor Kinetic Hardener II
Heat Sink II                    x2
Damage Control II

RIGS
Large Auxiliary Nano Pump I     x2
Large Energy Locus Coordinator I

DRONES
Ogre II  x5   (heavy drones — maximum DPS)

AMMO TO CARRY
Scorch L         — your PRIMARY ammo. 60+ km range, excellent damage. Use this 90% of the time
Conflagration L  — short range, maximum damage at under 15 km. Use when rats are close
Imperial Navy Multifrequency L — medium range, high damage when Scorch is not enough
What to Do — Step by Step
The Paladin with Bastion Module is a stationary fortress. When Bastion is active you cannot move, but your tank becomes nearly indestructible and your weapons hit harder. Plan your position before activating it.
Choosing an Agent and Mission
- Run level 4 security missions for Amarr Empire, Khanid Kingdom, or any Amarr faction agent
- Best agent location: find a level 4 agent in a 0.5 security system — you can use a jump clone or just fly there
- Decline missions against Angels / Minmatar if possible (they deal explosive damage which is your weak point)
- Accept missions against Blood Raiders, Sansha, Guristas, Serpentis — these are easy in a Paladin
Before Warping to the Mission
- Load Scorch L in all four pulse lasers
- Fill your cargo with Navy Cap Booster 800 (carry at least 20)
- Make sure your tracking computer has Optimal Range Script loaded
Arriving at the Mission Pocket
- Warp to the mission acceleration gate
- Activate the gate — you are transported inside
- Immediately assess the room — how many rats, how close are they?
- If rats spawn very close (under 20 km), burn away to get range before activating Bastion
- Once you are at a good position (40–60 km from the main group), stop your ship
Activating Bastion — The Core Loop
- Activate Bastion Module — 60 second cycle. You cannot move while active.
- Your armor repairers now repair more HP per cycle
- Your weapons have increased optimal range
- You are immune to electronic warfare (no one can jam or disrupt you)
- Activate both Large Armor Repairers — keep them cycling constantly
- Activate both Heat Sinks — passive, always on
- Activate Tracking Computer — passive, always on
- Select your target — always shoot the highest-priority threat first:
- Frigates that tackle → kill first (they apply a warp scrambler)
- Energy neutralisers → kill second (they drain your cap)
- Battleships → kill last (most HP, least threatening individually)
- Activate all 4 Mega Pulse Lasers on your target
- Launch Ogre IIs — send them onto frigates to kill tackle fast
Managing Your Capacitor
The Paladin is cap-hungry. Watch the capacitor bar at all times.
| Cap Level | Action |
|---|---|
| Above 50% | Normal operation — all good |
| Below 40% | Activate Cap Booster II — click it once to inject a Navy Cap Booster 800 |
| Below 20% | Activate Cap Booster AND turn off one armor repairer temporarily |
| Empty | You are in trouble — turn off lasers, keep repairers running, booster immediately |
Using the Large Micro Jump Drive (LMJD)
If a dangerous spawn appears right next to you at close range and you cannot tank it:
- Activate the LMJD — 12 second spool up, then it jumps you exactly 100 km in the direction you are pointed
- This instantly removes you from a dangerous situation
- Wait for Bastion to complete its cycle first if possible (you cannot use LMJD while Bastion is active)
Ammo by Mission Enemy
| Enemy Faction | Weak To | Load This |
|---|---|---|
| Blood Raiders | EM, Thermal | Scorch L (EM) |
| Sansha’s Nation | EM, Thermal | Scorch L (EM) |
| Guristas | Kinetic, Thermal | Conflagration L or Navy Multifreq |
| Serpentis | Kinetic, Thermal | Conflagration L or Navy Multifreq |
| Angels (Cartel) | Explosive, Kinetic | Switch to projectiles if possible |
| Mercenaries | Thermal, Kinetic | Conflagration L |
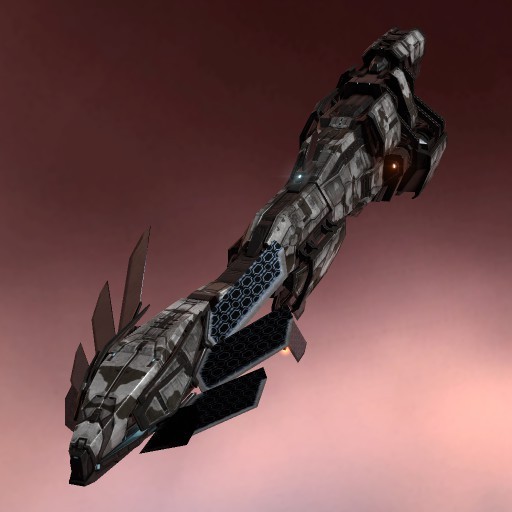
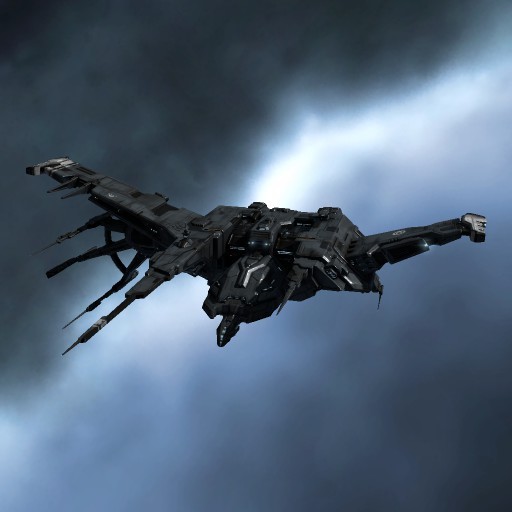
Loki — Armour PvP Brawler
Loki — Minmatar Strategic Cruiser (T3)
The Fit
[Loki, xNightShadex Armour PvP]

SUBSYSTEMS
Defensive:   Adaptive Nanocite
Offensive:   Turret Concourse
Propulsion:  Chassis Optimization
Core:        Augmented Plating

HIGH SLOTS
425mm AutoCannon II             x5
Covert Ops Cloaking Device II

MID SLOTS
50MN Quad LiF Restrained Microwarpdrive
Warp Disruptor II
Stasis Webifier II

LOW SLOTS
Damage Control II
Gyrostabilizer II               x2
1600mm Rolled Tungsten Compact Plates
Energized Adaptive Nano Membrane II
Medium Ancillary Armor Repairer  (loaded with Nanite Repair Paste)

RIGS
Medium Projectile Collision Accelerator I
Medium Trimark Armor Pump I     x2

DRONES
Warrior II  x5

AMMO TO CARRY
Republic Fleet EMP M   — primary ammo, max damage up close
Phased Plasma M        — thermal damage, good against armour
Barrage M              — falloff ammo if you need range
What to Do — Step by Step
The Loki is a cloaking armour brawler. You use the covert cloak to approach unseen, then uncloak and immediately apply everything at once. It hits harder than most cruisers and is significantly harder to kill.
Before the Fight
- Load Republic Fleet EMP M in all five autocannons
- Make sure your Ancillary Armor Repairer has Nanite Repair Paste loaded (gives multiple burst repairs)
The Approach
- Activate Covert Ops Cloak as soon as you are on grid
- Right-click cloak → Activate, or click the module button
- Warp to the target while cloaked — the Loki can do this, most ships cannot
- Come out of warp at zero on the target
The Uncloak Attack — Do Everything in 2 Seconds
The moment you land, you have a 2-second decloak timer before modules can fire. Prepare to click everything:
- Deactivate cloak
- The instant modules become available:
- Warp Disruptor → on target
- Stasis Webifier → on target
- MWD → activate (burst to close any gap)
- All 5 autocannons → on target
- Click Orbit → 500 m on the target
- Launch Warrior IIs → Attack target
During the Fight
| Situation | What to Do |
|---|---|
| Your armour drops below 50% | Activate Ancillary Armor Repairer — it fires several times in a burst |
| Ancillary repairer runs out of paste | It goes into a long reload — keep your Damage Control active and use your plates to absorb |
| Target has a fast frigate tackle on you | Send Warrior IIs onto the frigate — kill it fast |
| Target pulls range | Switch to Barrage M, keep disruptor and web active |
| Second hostile lands | Assess: if you can kill the first target in 10 seconds, stay. If not, warp out. |
Orbit Distance Guide for the Loki
| Orbit Distance | Best Against | Why |
|---|---|---|
| 500 m | Battlecruisers, cruisers | Tight orbit reduces their tracking, you apply full damage |
| 2,500 m | Frigates, destroyers | Slightly wider to avoid running past them |
| 10,000 m with Barrage | Large/slow targets | Maintain range, apply falloff damage |
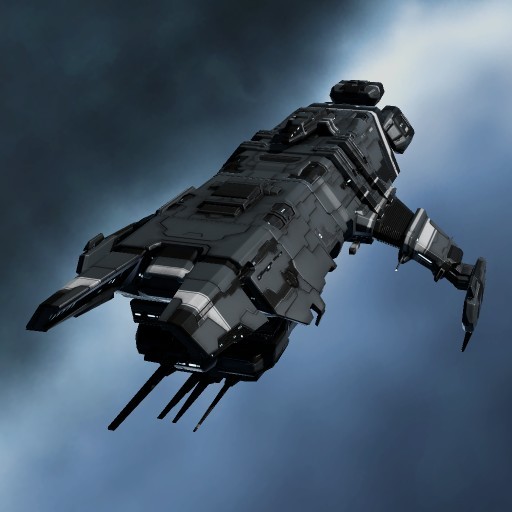
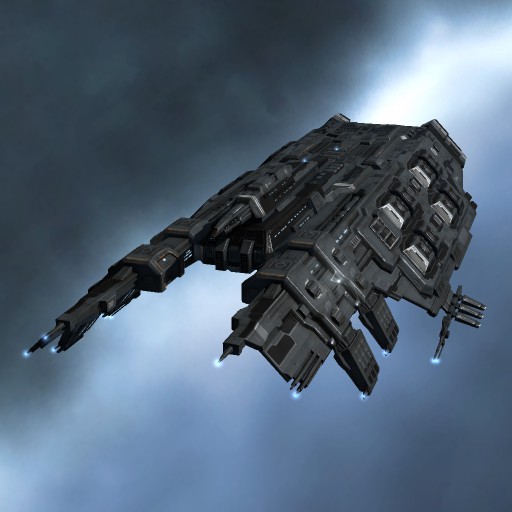
Guardian — Fleet Logistics
Guardian — Amarr Logistics Cruiser (T2)
The Fit
[Guardian, xNightShadex Fleet Logi]

HIGH SLOTS
Large Remote Armor Repairer II  x4
Capacitor Transmitter II        x2

MID SLOTS
Afterburner II
Cap Recharger II                x2
Omnidirectional Tracking Link I  (Optimal Range Script)

LOW SLOTS
Capacitor Power Relay II        x2
Damage Control II

RIGS
Large Nanobot Accelerator I     x2
Large Processor Overclocking Unit I

DRONES
Hobgoblin II  x5   (self-defence only)
What to Do — Step by Step
The Guardian is the most important ship in an armour fleet. Two Guardians working together in capacitor chain can repair indefinitely without running out of cap. This is how it works.
Before the Fleet Starts — Establish Cap Chain
This is the most important thing you do. Before the first shot is fired:
- Identify the other Guardian pilot on comms — ask “who is the other Guardian?”
- Activate both Capacitor Transmitters on them — right-click their ship → Activate Cap Transmitter
- They do the same to you — their cap transmitters go on your ship
- You are now in cap chain — you feed each other cap. Both Guardians stay full on capacitor indefinitely as long as both are alive.
Without cap chain, you will run out of capacitor in 2–3 minutes. With it, you never run out.
During the Fight — Your Workflow
- Activate your Afterburner — always keep it running. You are a priority target; being fast makes you harder to hit
- Orbit the main fleet at 10,000 m — stay close enough to reach anyone, far enough to avoid the main fire
- Watch the fleet broadcast window — when someone broadcasts for armour repair, they appear there
- Click the broadcast → it selects the target automatically
- Activate two Large Remote Armor Repairers on that target — they have a 1.5 second cycle
- Watch their armour bar — keep repping until it is back to 100%
Timing Your Repairs — The Most Important Skill
Remote armor repairers have a delay — they take 1.5 seconds per cycle. You need to pre-rep: start repairing before the target’s armour is gone, not after.
| Armour % | Action |
|---|---|
| 100% | Monitor only |
| 80% | Put one repper on them — pre-emptive |
| 60% | Put both reppers on them — they are in danger |
| 40% | Call on comms “heavy reps on [name]” — get other logi on them |
| 20% | Use all four reppers if needed — this person is about to die |
Prioritising Who to Repair
| Priority | Who | Why |
|---|---|---|
| 1st | The other Guardian | If your cap chain partner dies, you both lose cap |
| 2nd | The FC | Losing the FC collapses the fleet |
| 3rd | DPS ships taking heavy fire | Keep the fleet fighting |
| 4th | Anyone else broadcasting | Standard fleet maintenance |
Staying Alive
- You will be targeted. Logistics pilots are high-value targets.
- Keep orbiting at 10,000 m with Afterburner running — constant movement
- Call on comms immediately if you are being primaried: “Logi primary, need reps”
- The other Guardian should immediately rep you
- If your cap chain partner dies — broadcast for cap and see if anyone can help, then consider warping out to safety
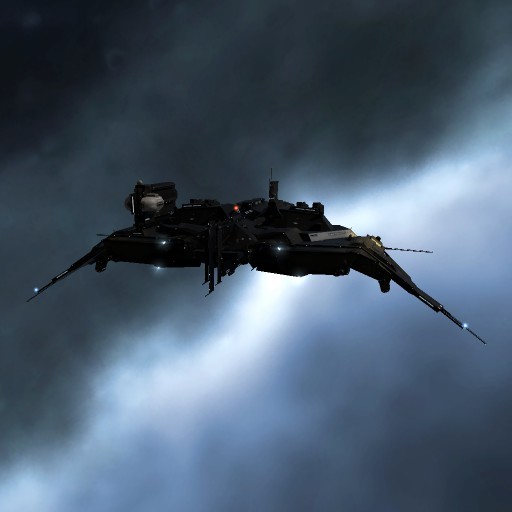
Absolution — Fleet Command

Absolution — Amarr Command Ship (T2)
The Fit
[Absolution, xNightShadex Fleet Command]

HIGH SLOTS
Medium Pulse Laser II           x5   (Conflagration M / Scorch M)
Armor Command Burst I           x2

MID SLOTS
50MN Microwarpdrive II
Warp Disruptor II
Cap Recharger II

LOW SLOTS
Damage Control II
1600mm Rolled Tungsten Compact Plates
Energized Adaptive Nano Membrane II
Heat Sink II                    x2
Armor Explosive Hardener II

RIGS
Medium Trimark Armor Pump I     x2
Medium Energy Locus Coordinator I

DRONES
Hammerhead II  x5

CHARGES TO CARRY (for Command Bursts)
Armor Reinforcement Charge      x10  — increases fleet armour resistances
Armor Energising Charge         x10  — increases fleet armour repair amount
What to Do — Step by Step
The Absolution is a fleet anchor ship — you deal damage AND boost everyone around you simultaneously. Every pilot within 15,000 m of you gets improved armour resistance or repair strength from your command bursts.
Before the Fleet Moves
- Load Conflagration M for brawling (close range, maximum DPS)
- Load Armor Reinforcement Charge in Command Burst 1
- Load Armor Energising Charge in Command Burst 2
- Activate MWD — keep it on as you move into position
During the Fight — Your Loop
This is what you do continuously on repeat:
- Anchor on the FC (or the designated anchor) at 2,500 m — orbit them at 2,500 m so you move with the fleet
- Activate Command Burst 1 (Armor Reinforcement) — 30 second duration, affects all friendlies within 15 km
- Activate Command Burst 2 (Armor Energising) — 30 second duration
- Fire pulse lasers at the called target — the FC announces the primary; shoot that ship
- When the command burst timers expire (30 seconds), activate both again immediately
- Launch Hammerhead IIs onto the primary target for extra DPS
Command Burst Timing
| Time | Action |
|---|---|
| 0:00 | Activate both command bursts |
| 0:30 | Both expire — activate both again immediately |
| 1:00 | Both expire — activate again |
| Repeat | Every 30 seconds without stopping |
Never let command bursts lapse — the moment they expire, reactivate them. The fleet is counting on the resistance bonus every second.
Lasers — What Ammo to Use
| Situation | Ammo | Range |
|---|---|---|
| Enemies at 5–15 km (brawling) | Conflagration M | Max DPS up close |
| Enemies at 15–40 km (skirmish) | Scorch M | Long range, excellent falloff |
| Enemies over 40 km | Scorch M + burn toward them | Push your MWD |
If You Are Called Primary (taking heavy damage)
- Call on comms: “Absolution primary, need reps”
- Your Guardians will respond immediately
- Keep command bursts running — do not stop boosting just because you are taking damage
- Orbit your anchor tighter (2,500 m) and keep moving
Next Goal — The Revelation Dreadnought

Revelation — Amarr Dreadnought (Capital) He has the cyno, the battleship skills, and the lasers. He needs one skill line.
xNightShadex has:
- ✅ Cynosural Field Theory V — can light cynos
- ✅ Advanced Spaceship Command V — capital ship prerequisite
- ✅ Amarr Battleship V — required
- ✅ Large Energy Turret V — the Revelation’s primary weapon
- ❌ Amarr Capital Ships — the only missing skill
Train Amarr Capital Ships I → III to enter a Revelation. Capital energy turrets will need training separately, but the ship access comes at Capital Ships I.
| Priority | Skill | Why |
|---|---|---|
| 1 | Amarr Capital Ships I → III | Enter the Revelation |
| 2 | Marauders IV → V | Max Paladin efficiency |
| 3 | Command Ships IV → V | Max fleet boost output |
| 4 | Heavy Assault Cruisers IV → V | Full Zealot performance |
Lady Damnation
| Race | Gallente — Jin-Mei |
| Born | June 2008 |
| Corporation | Southern Crossfire |
| Current Ship | Iteron Mark V (Get to the Choppa) |
| Security Status | 0.0 — clean |
| Currently Training | Mass Production IV |
| Role | Industry, hauling, manufacturing, reprocessing |
Lady Damnation is not a combat pilot — and that is entirely by design. She is an industry and logistics character built to manufacture items, haul goods across space, reprocess ore into minerals, and keep the supply lines running. Every fleet needs someone like this. She is the reason the other pilots have ships to fly and ammo to shoot.
Her core strengths:
- Industry 5 — manufactures items at maximum speed, minimum time
- Gallente Hauler 5 — flies the largest T1 Gallente haulers with maximum cargo capacity
- Reprocessing 5 — converts ore into minerals at high efficiency
- Advanced Industry 4 — further reduces manufacturing time
- Mass Production 3 — runs 5 manufacturing jobs simultaneously (training to 4 for 6 jobs)
- Research 4, Laboratory Operation 3 — can research blueprints to improve material and time efficiency
She has minimal combat skills. That is fine — she is not meant to fight.
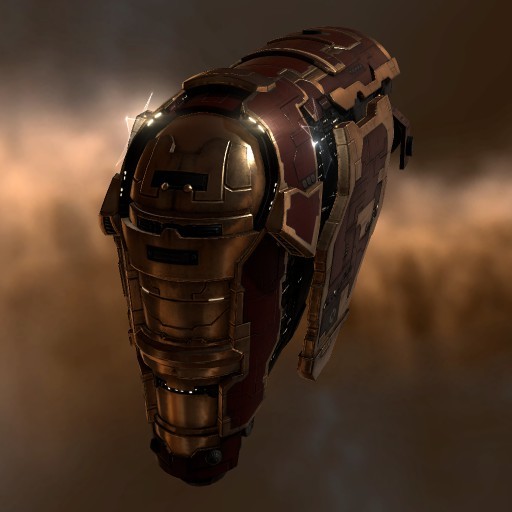
Iteron Mark V — What She Flies Now
Iteron Mark V — Gallente T1 Industrial Maximum cargo capacity for a T1 hauler — 38,000+ m³ with expanded cargohold rigs
The Fit
[Iteron Mark V, Lady Damnation — Max Cargo Hauler]

HIGH SLOTS
(empty — she is not a combat ship)

MID SLOTS
Medium Shield Extender I    (basic protection while in space)
Survey Scanner I            (optional — for scanning asteroid belts)

LOW SLOTS
Expanded Cargohold II       x3   (massively increases cargo space)
Damage Control I            (minimal tank — better than nothing)

RIGS
Medium Cargohold Optimization I   x3   (further increases cargo capacity)
Resulting cargo capacity: approximately 38,000–42,000 m³
For reference: a full load of T1 ammo, modules, or minerals fills this in one trip. She can haul an enormous amount per run.
What Lady Damnation Actually Does
Manufacturing
Manufacturing in EVE works like this:
- Obtain a Blueprint Original (BPO) — buy from the NPC market (press M → search the item name → find it in the NPC sell orders in Jita or Amarr). BPOs are expensive but permanent.
- Research the blueprint — use Laboratory Operation and Research skills to improve the blueprint’s Material Efficiency (ME) and Time Efficiency (TE). Higher ME means the job uses fewer minerals. Do this before manufacturing.
- Right-click the BPO → Research → select Material Efficiency research → pick a station with open research slots
- Install a manufacturing job — go to any station with manufacturing slots (most stations have them), right-click the BPO → Manufacture → confirm materials and submit
- Collect the output when the timer completes
Lady Damnation can run 5 manufacturing jobs simultaneously (Mass Production 3 = 5 slots). When Mass Production 4 finishes training, she gets 6 slots.
What to manufacture for profit:
- Ammunition — high demand, fast to produce, sells constantly
- Drones — Hobgoblin IIs and Warrior IIs are consumed constantly and sell well
- Modules — Shield Extenders, Damage Controls — high volume demand
Reprocessing
Reprocessing converts raw ore into minerals. With Reprocessing 5, she gets close to the maximum mineral yield from ore.
- Put ore in your item hangar at a station
- Right-click the ore → Reprocess
- Confirm — minerals appear in your hangar
The minerals she produces are the raw materials for manufacturing. She can mine ore → reprocess → manufacture → sell finished goods, completing the entire production chain herself.
Hauling
With Gallente Hauler 5 and an expanded Iteron Mark V, she can haul:
- Minerals from mining systems to trade hubs for sale
- Manufactured goods from production stations to market hubs
- Supplies (ammo, modules) from Jita to wherever the fleet needs them
- Ore from mining fleets back to the refinery
Safe hauling rules:
- Never haul more ISK than you are willing to lose in one trip
- Avoid Uedama, Niarja, Rancer — these are common suicide ganking systems
- Check the route with Dotlan (dotlan.net/route) before hauling expensive loads
- If you are carrying over 1 billion ISK of cargo, use a Transport Ship or get an escort
What Lady Damnation Should Train Next
| Priority | Skill | Train To | Why |
|---|---|---|---|
| 1 | Mass Production | 3 → 4 (in queue) | 6 simultaneous manufacturing jobs |
| 2 | Transport Ships | I → IV | Unlocks the Occator / Viator — T2 haulers with far better tank and cargo |
| 3 | Gallente Industrial | I → V | Required for T2 industrial ships |
| 4 | Mass Production | 4 → 5 | 7 simultaneous jobs — maximum slots |
| 5 | Advanced Mass Production | I → IV | Even more manufacturing slots |
| 6 | Reprocessing Efficiency | I → V | Better mineral yield from ore |
| 7 | Industry | already 5 ✅ | Done |
The Most Important Train: Transport Ships
Transport Ships unlocks two ships that transform her hauling capability:
- Occator (Gallente Deep Space Transport) — massive cargo hold (50,000+ m³), significantly tanky — hard to gank
- Viator (Gallente Blockade Runner) — covert ops cloaking device fitted, warp while cloaked — effectively impossible to catch
Right now her Iteron is a soft target. A Transport Ship changes that entirely.
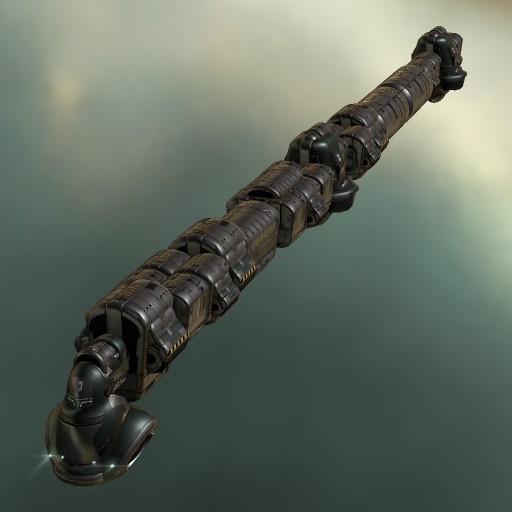
Destination — The Viator Blockade Runner

Viator — Gallente Blockade Runner (T2) Fits a covert ops cloak. Warps while cloaked. Cannot be caught by normal means.
The Viator is the ultimate hauling ship for high-value, low-volume cargo. It fits a Covert Ops Cloaking Device — meaning it warps while invisible. Gate camps, suicide gankers, and interdictor bubbles cannot stop it. A Viator pilot carrying 500 million ISK of goods is effectively safe anywhere in the game.
What she needs:
- Gallente Industrial I → V
- Transport Ships I → IV
The Viator Fit
[Viator, Lady Damnation — Covert Hauler]

HIGH SLOTS
Covert Ops Cloaking Device II

MID SLOTS
Medium Shield Extender II
5MN Microwarpdrive II   (MWD + cloak trick to avoid bubbles)

LOW SLOTS
Expanded Cargohold II   x2

RIGS
Medium Cargohold Optimization I   x2
MWD-Cloak trick: Activate MWD and cloak simultaneously the moment you land on grid from a gate. Your ship accelerates to warp speed while cloaked, then warps away before anyone can lock you. This makes the Viator effectively uncatchable even in null-sec.
Full Skill Sheet — Lady Damnation
Click to expand</summary>
Skill Level EM Armor Compensation 2 Explosive Armor Compensation 2 Hull Upgrades 4 Kinetic Armor Compensation 2 Mechanics 5 Repair Systems 3 Thermal Armor Compensation 2 Corporation Management 3 Diplomatic Relations 3 Drones 3 Mining Drone Operation 1 Capacitor Systems Operation 3 Energy Grid Upgrades 2 Power Grid Management 5 Gunnery 1 Small Hybrid Turret 1 Cybernetics 1 Infomorph Psychology 1 Advanced Industry 4 Industry 5 Mass Production 3 (training → 4) Mining 4 Reprocessing 5 Laboratory Operation 3 Research 4 Science 4 Social 3 Gallente Frigate 3 Gallente Hauler 5 Spaceship Command 5 Anchoring 1 Trade 2
</details>
chronicbomb
Race Minmatar — Sebiestor Security Status −1.02 — low-sec veteran Current Ship Drake Free Skill Points 256,033 — spend on Command Ships now Best At Solo PvP, small-gang roaming, missile DPS, covert tackle
chronicbomb is a combat pilot built for killing things. She has maxed projectile weapons at every ship size, a full missile suite, excellent drones, covert ops access, and tackling skills. The −1.02 security status means she has been in real fights in dangerous space. She is not a theory-crafter — she is operational.
Hurricane — Solo PvP Brawler
Hurricane — Minmatar Battlecruiser
The Fit
[Hurricane, chronicbomb Solo PvP]

HIGH SLOTS
425mm AutoCannon II            x6
'Arbalest' Assault Missile Launcher  x2

MID SLOTS
50MN Quad LiF Restrained Microwarpdrive
Warp Disruptor II
Medium Shield Extender II
Invulnerability Field II

LOW SLOTS
Damage Control II
Gyrostabilizer II              x2
Nanofiber Internal Structure II  x2

RIGS
Medium Core Defense Field Extender I   x2
Medium Projectile Collision Accelerator I

DRONES
Warrior II  x5   (fast light drones for tackle and small ships)

AMMO TO CARRY
Phased Plasma M   — close range, max damage vs armour
EMP M             — close range, max damage vs shield
Barrage M         — long range, 20–30 km falloff, reduced damage
Republic Fleet EMP M  — faction ammo for when you need that extra bite
What to Do — Step by Step
Before You Undock
- Load Phased Plasma M as your starting ammo (works against most targets)
- Set drones to Warrior II — fast, good tracking, kills frigates that try to tackle you
- Make sure your Invulnerability Field and Shield Extender are in your mid slots
Approaching the Target
- Activate your MWD the moment you land on grid — you need speed to close the gap fast
- Burn straight at the target at full speed
- When you reach 20 km, activate your Warp Disruptor — this prevents them from warping away
- Keep burning toward them
At Close Range (0–5 km) — Brawling Mode
- When within 3–5 km, click Orbit → 500 m on the target
- Orbiting creates angular velocity — this makes you harder to hit by large guns
- 500 m is tight enough that your autocannons track perfectly
- Activate all 6 autocannons — right-click the gun group and select “Activate All”
- Activate both missile launchers on the same target
- Launch your drones — right-click drone bay → Launch All, then right-click target → Attack
- Keep the Invulnerability Field and Shield Extender running at all times — they are passive but consume capacitor, check your cap bar
Reading the Fight
Situation What to Do Target is pulling range past 10 km Switch ammo to Barrage M, keep orbiting A hostile frigate is tackling you Send drones onto it — Warrior IIs kill frigates fast Your shields drop below 30% Overheat your shield extender (right-click → Overheat) for extra HP You need to escape Overheat your MWD, burn away in a straight line, warp out when disruptor range drops Target has very high armour resist Swap from Phased Plasma M to EMP M for the EM damage
Ammo Choice Made Simple
Range to Target Load This Why 0–5 km Phased Plasma M Max thermal/kinetic damage up close 5–20 km EMP M EM damage hits well at this range 20–30 km Barrage M Extended falloff, keeps damage applying
If Things Go Wrong
- If you are losing, overheat the MWD (right-click → Overheat) for 30 seconds of extra speed
- Point your camera away from the fight, warp to a celestial (planet, moon, gate — anything)
- Do not try to fight through a losing battle — the Hurricane is replaceable
Drake — PvE Mission Runner
Drake — Caldari Battlecruiser
The Fit
[Drake, chronicbomb PvE]

HIGH SLOTS
Heavy Assault Missile Launcher II   x7

MID SLOTS
Large Shield Extender II            x2
Invulnerability Field II
EM Ward Field II
50MN Microwarpdrive II

LOW SLOTS
Ballistic Control System II         x3
Damage Control II

RIGS
Medium Core Defense Field Extender I   x2
Medium Anti-EM Screen Reinforcer I

DRONES
Hobgoblin II  x5   (medium damage, good for frigates)

AMMO TO CARRY
Scourge Rage HAM    — max damage, short range (under 20 km) — use this most of the time
Caldari Navy Scourge HAM  — longer range, slightly less damage
Inferno Rage HAM    — thermal damage for Guristas/Caldari rats
What to Do — Step by Step
Before You Warp to the Site
- Load Scourge Rage HAM — this is your main ammo
- Check which NPC faction you are fighting and pick the right ammo:
- Angel Cartel / Minmatar rats → Scourge (kinetic) or Explosive
- Guristas / Caldari rats → Inferno (thermal) or Kinetic
- Sansha / Blood Raiders → EM or Thermal
- Serpentis → Kinetic or Thermal
- HAMs have a range of roughly 17–22 km — you need to be inside this to hit
Arriving at the Site
- Warp to the site at 30 km (warp-to distance dropdown before you click warp)
- Assess the room — identify the main group of rats
- Burn toward the largest group using MWD until you are 15–20 km away
- Activate all 7 HAM launchers — right-click launcher group → Activate All
- Orbit the group at 10 km — click Orbit → set to 10,000 m
- This keeps you in HAM range while maintaining some speed
During the Fight
- Launch drones — they auto-attack your current target
- Shoot frigates first — small fast ships can disrupt your cap/shield if ignored
- Then kill cruisers, then battlecruisers
- Your shields are passive — the large shield extenders and invuln field just sit there and absorb. Watch the shield bar; if it drops below 50%, you may be overwhelmed — warp out
Managing Range
HAMs need the target within 22 km to hit properly. If a target moves beyond that:
- Burn toward it with MWD
- Or switch to Caldari Navy Scourge HAM for extra range
When the Room Is Clear
- Recall drones before warping
- Loot wrecks if you have a salvager — or bookmark them for a salvage run later
Vagabond — Roaming Kiter
Vagabond — Minmatar Heavy Assault Cruiser (T2)
The Fit
[Vagabond, chronicbomb Roaming PvP]

HIGH SLOTS
220mm Autocannon II             x5

MID SLOTS
50MN Quad LiF Restrained Microwarpdrive
Warp Disruptor II
Medium Shield Extender II
Invulnerability Field II

LOW SLOTS
Gyrostabilizer II               x2
Damage Control II
Nanofiber Internal Structure II  x2

RIGS
Medium Projectile Collision Accelerator I
Medium Core Defense Field Extender I   x2

DRONES
Warrior II  x5

AMMO TO CARRY
Barrage M          — your PRIMARY ammo — load this before every fight
Republic Fleet EMP M — close range burst if target is webbed and not moving
Phased Plasma M    — close range backup
What to Do — Step by Step
The Vagabond is a kiting ship. You do NOT brawl at zero. You maintain distance, orbit, and let your falloff damage do the work. Speed is your tank — if you stop moving, you die.
The Golden Rule of the Vagabond
Never orbit below 15 km. Never stop your MWD. If someone webs you, warp out immediately.
Before the Fight
- Load Barrage M — always. This is your kiting ammo and has excellent falloff out to 25–30 km
- Make sure Nanofibers are in your lows — these increase your speed and agility
Approaching a Target
- Come in at an angle — do not burn straight at the target, approach at roughly 45 degrees
- When you reach 30 km, activate your Warp Disruptor (24 km range — get within this)
- Do NOT close further — click Orbit → 20,000 m immediately
- Activate all 5 220mm Autocannons with Barrage M loaded
- Keep your MWD running at all times — speed is your tank
- Launch Warrior IIs onto the target for extra DPS
During the Fight — Maintaining the Orbit
Situation What to Do Target tries to close range (burning at you) Immediately increase orbit to 25,000 m — stay at the edge of disruptor range Target is a slow battleship Drop to 15,000 m orbit for better damage application Target launches drones that chase you Your speed outpaces most drones — if not, recall your drones and kite the enemy drones away A second enemy lands on grid Evaluate: if they are fast, warp out. Do not let yourself get caught Target tries to warp Keep disruptor active — check it every 10 seconds
Range is Everything
Your orbit Damage application Risk 5 km Max damage — but they can hit you Very high 15 km Very good — Barrage M falloff Low 20 km Good — comfortable kiting range Very low 30 km Reduced — approaching Barrage max falloff Escape range
How to Escape
- If anything fast lands on grid and closes to within web range of you (10–15 km), overheat MWD and warp immediately
- The Vagabond is fast enough to simply outrun most things — use that speed
Rapier — Fleet Tackle
Rapier — Minmatar Force Recon (T2)
The Fit
[Rapier, chronicbomb Fleet Tackle]

HIGH SLOTS
Covert Ops Cloaking Device II
Sisters Core Probe Launcher   (Sisters Core Scanner Probes)

MID SLOTS
50MN Quad LiF Restrained Microwarpdrive
Warp Disruptor II
Stasis Webifier II             x2

LOW SLOTS
Damage Control II
Nanofiber Internal Structure II  x2

RIGS
Medium Low Friction Nozzle Joints I
Medium Auxiliary Thrusters I
Medium Anti-EM Screen Reinforcer I

DRONES
Warrior II  x5   (self-defence only — you are not a DPS ship)
What to Do — Step by Step
The Rapier is a tackle and disruption ship. Your job is not to deal damage. Your job is to catch the target and hold it still so your fleet can kill it. You are the most important person in the gang.
Before the Fleet Op
- Load your probe launcher with Sisters Core Scanner Probes
- Set your Warp Disruptor and both Webifiers in your mid slots
- Cloak up as soon as you undock — the Covert Ops Cloak lets you warp while cloaked
Cloaked Approach to Target
- Warp to a perch 100–200 km from the target (warp to target at 150 km) — survey the field while cloaked
- Identify your target — the FC will call it on comms
- Warp toward the target at zero while still cloaked
- The Covert Ops Cloak lets you warp while cloaked — this is your superpower
- Land within 2 km of the target
The Tackle — Do This Fast
The moment you land:
- Uncloak (click the cloak off)
- Immediately activate:
- Warp Disruptor → click target
- Stasis Webifier → click target
- Second Stasis Webifier → click target
- MWD → click activate
- Call tackle on comms: “Tackle on [ship class] at [your position]”
- Orbit the target at 5,000 m to make yourself harder to hit
There is a 2-second decloak delay before you can activate modules — use that 2 seconds to click everything in sequence so they all fire the instant the timer clears.
What Your Webs Do
Two Stasis Webifiers reduce the target’s speed by roughly 80–90%. A battleship moving at 200 m/s becomes a 20 m/s crawl. Your fleet lands and kills it before it can react.
During the Tackle
Situation What to Do Target tries to burn away Keep orbit at 5 km — you are faster than them with webs applied Target shoots you Orbit tightly at 2,500 m — smaller orbit = harder to track Target has support frigates Launch Warrior IIs on the closest frigate to you Target is about to die Keep tackle active until it explodes — do not release early You are being primaried (taking heavy damage) Warp out — a live Rapier is more valuable than a dead one
After the Kill
- Re-cloak immediately
- Warp to a safe spot
- Prepare for the next target
Next Goal — Sleipnir
Sleipnir — Minmatar Command Ship (T2) Train Command Ships V. Everything else is already done.
The Sleipnir is a Hurricane that has been upgraded in every way — better tank, more speed, and built-in command bursts that improve every pilot near you. chronicbomb has Leadership 5, Command Burst Specialist 4, Minmatar Battlecruiser 5, and Minmatar Cruiser 5. She needs only Command Ships IV → V.
Put the 256,033 free skill points into Command Ships right now. It won’t fully train it but it gives a significant head start.
Screams Eternal
Race Caldari — Civire Born Christmas Day, 2008 Corporation State War Academy Current Ship Drake (Sydney) Security Status 0.0 — clean slate Attributes Perception 24, Willpower 24 — perfect for weapon skills Free Skill Points 0 Skill Queue Empty — needs a plan
Screams Eternal is a focused missile pilot who has spent her entire training time getting good at one thing: firing heavy missiles out of a Drake. She is not spread thin across multiple weapon systems. Heavy Missiles 5, Missile Launcher Operation 5, Missile Bombardment 5 — her missile core is solid. She is a beginner-to-intermediate character who has the foundation right, and just needs to build upward from here.
Her attributes — Perception 24, Willpower 24 — are the best possible for training gunnery and missile skills quickly. Every missile skill she trains from here will complete faster than average.
Drake — What She Flies Now
Drake — Caldari Battlecruiser The right ship for where she is right now
The Fit
[Drake, Screams Eternal — PvE Starter]

HIGH SLOTS
Heavy Missile Launcher II        x7
  (upgrade from T1 launchers when you can — needs Missile Launcher Op 5 ✅)

MID SLOTS
Large Shield Extender II
Invulnerability Field II
Shield Boost Amplifier I         (or second LSE when you can fit it)
EM Ward Field I
50MN Afterburner II

LOW SLOTS
Ballistic Control System II      x2   (or T1 versions — BCS I — until you can afford T2)
Damage Control I

RIGS
Medium Core Defense Field Extender I   x2
Medium Anti-EM Screen Reinforcer I

DRONES
Hobgoblin I   x5   (light combat drones, kills frigates)

AMMO TO CARRY
Scourge Heavy Missile       — your default, kinetic damage, all-round use
Inferno Heavy Missile       — thermal damage for Guristas rats
Mjolnir Heavy Missile       — EM damage for Blood Raiders / Sansha rats
Nova Heavy Missile          — explosive damage for Angel Cartel rats
Note: She has Heavy Missiles 5 but she does NOT yet have Heavy Assault Missiles trained. Use Heavy Missiles (not HAMs) for now. The range is better and they still hit hard.
What to Do — Step by Step
Before Warping to a Site
- Load Scourge Heavy Missile as your default ammo
- Check the mission briefing — it tells you which NPC faction you are fighting
- Switch ammo based on the table below (takes 10 seconds to reload)
Ammo by Enemy
Enemy Ammo to Use Damage Type Guristas (Caldari rats) Inferno Heavy Missile Thermal Blood Raiders Mjolnir Heavy Missile EM Sansha’s Nation Mjolnir Heavy Missile EM Angel Cartel Nova Heavy Missile Explosive Serpentis Scourge Heavy Missile Kinetic Unknown / Mixed Scourge Heavy Missile Kinetic
Arriving at the Mission
- Warp in at 30 km — use the distance dropdown before clicking warp
- Do NOT burn straight into the middle of the enemy group — the Drake’s missiles have range, use it
- Orbit at 30,000 m on the centre of the enemy group — this keeps you at optimal Heavy Missile range
- Activate all 7 missile launchers — right-click the launcher group → Activate All
- Launch 5 Hobgoblins — they will automatically assist you
- Shoot frigates first — small fast ships that tackle and scramble you are the biggest danger
- Then shoot cruisers, then battlecruisers
Keeping Your Tank Up
The Drake tanks with its shield buffer — the large shield extenders give you a big HP pool that absorbs damage. You do not repair during a fight normally; you rely on having enough shield HP to outlast the enemy damage.
Shield % Action 100%–50% Normal — you are fine 50%–30% Check how many enemies are left — if few, keep going Below 30% Warp out immediately to a station or safe bookmark
The Drake is tough but not invincible. If you are taking more damage than you can manage, warping out is not failure — it is the smart move. You can warp back in.
Range Management
Heavy Missiles have an optimal range of roughly 60 km. You should almost never need to move closer than 20 km. If enemies spawn right on top of you, burn away with the afterburner until you have 20+ km of space, then orbit.
What Screams Eternal Should Train Next
Her skill queue is empty right now — she needs a plan immediately. Every day without a skill training is wasted time.
Priority Training Plan
Priority Skill Train To Why 1 Heavy Assault Missiles Level 5 Unlocks HAMs — shorter range but significantly more DPS than Heavy Missiles. Essential for the Drake. 2 Caldari Battlecruiser Level 5 Improves Drake performance — more launcher hardpoints and better bonuses at 5 3 Shield Management Level 4 More total shield HP — makes the Drake harder to kill 4 Caldari Battleship Level 1 → 3 Unlocks the Raven — her long-term goal 5 Missile Bombardment Already 5 ✅ Done 6 Target Navigation Prediction Level 4 Helps missiles hit moving targets — important for PvP later 7 Rapid Launch Level 4 Faster missile launch rate — more DPS
What to Put in the Queue Right Now
Open the skill queue (Alt+A), search for each of these, and add them in this order:
- Heavy Assault Missiles I → V
- Caldari Battlecruiser IV → V
- Shield Management I → IV
- Caldari Battleship I → III
This gives her 2–3 months of productive training without needing to think about it again.
Destination — The Raven
Raven — Caldari Battleship The natural next step after the Drake — a bigger, harder-hitting missile platform
The Raven is a Caldari battleship that fires cruise missiles — the largest missile type in the game. It hits harder, tanks more, and can run level 4 missions that the Drake struggles with. Screams Eternal needs Caldari Battleship I to enter one, which requires Caldari Cruiser IV (already trained ✅) and Caldari Frigate IV (already trained ✅).
What she needs to train:
- Caldari Battleship I (to get in) → III (to be effective)
- Cruise Missiles I → V (the Raven’s primary weapon)
- Cruise Missile Specialization I → III (for T2 cruise missiles)
Once in a Raven, she shifts from heavy missiles to cruise missiles — same concept, much bigger damage and range.
The Raven Fit (Future Goal)
[Raven, Screams Eternal — L4 Missions]

HIGH SLOTS
Cruise Missile Launcher II       x6
Cruise Missile Launcher II       x1   (or Heavy Neutraliser for utility)

MID SLOTS
Large Shield Extender II         x2
Invulnerability Field II         x2
EM Ward Field II
Cap Recharger II

LOW SLOTS
Ballistic Control System II      x3
Damage Control II

RIGS
Large Core Defense Field Extender I   x2
Large Anti-EM Screen Reinforcer I

DRONES
Hobgoblin II  x5
Full Skill Sheet — Screams Eternal
Click to expand</summary>
Skill Level Mechanics 3 Drone Avionics 1 Drones 1 Light Drone Operation 1 Medium Drone Operation 1 Electronic Warfare 2 Capacitor Systems Operation 3 CPU Management 4 Electronics Upgrades 1 Energy Grid Upgrades 4 Power Grid Management 4 Gunnery 3 Sharpshooter 2 Small Hybrid Turret 3 Defender Missiles 2 Heavy Missile Specialization 1 Heavy Missiles 5 Light Missiles 4 Missile Bombardment 5 Missile Launcher Operation 5 Afterburner 4 Navigation 1 Cybernetics 1 Mining 1 Survey 1 Science 3 Shield Compensation 3 Shield Emission Systems 4 Shield Operation 4 Shield Upgrades 4 Tactical Shield Manipulation 4 Caldari Battlecruiser 4 Caldari Battleship 0 (book owned) Caldari Cruiser 4 Caldari Frigate 4 Spaceship Command 5
</details>
Side by Side
chronicbomb xNightShadex Fly right now for ISK Drake — HAM missions Paladin — L4 missions Fly right now for PvP Hurricane or Vagabond Loki Fly right now for fleet Rapier (tackle) Guardian (logi) or Absolution (command) One train away from Sleipnir Revelation dreadnought Sec Status −1.02 (can enter low-sec freely) +2.34 (stays green) Free SP 256,033 — spend on Command Ships 0
Ammo & Market Buying Guide
chronicbomb is based at Rens (Minmatar trade hub). xNightShadex is based at Amarr (Amarr trade hub). Everything below can be bought at either hub — or in bulk at Jita 4-4 which has the largest market in the game.
How to Buy Ammo in EVE
- Press M to open the Market
- Use the search bar at the top — search the exact ammo name
- Click Buy tab on the right side
- Find the cheapest listing in your current station or nearby systems
- Right-click a listing → Buy This → set quantity → confirm
Where to shop:
Hub Location Best For Jita 4-4 (Caldari Navy Assembly Plant) The Forge region Everything — biggest market, lowest prices Rens (Brutor Tribe Treasury) Heimatar region Minmatar ammo, projectile modules — chronicbomb’s home Amarr (Emperor Family Academy) Domain region Laser crystals, armour modules — xNightShadex’s home
If something is out of stock locally, check Jita. It is almost never out of stock and prices are usually 5–10% cheaper than regional hubs.
chronicbomb — What to Buy and How Much
Projectile Ammo (for Hurricane and Vagabond)
Projectile ammo is physical rounds — they sit in your cargo and are consumed when you fire. Buy in batches of 5,000–10,000 rounds per type. They are cheap and light.
Ammo Name Search For Use On Range Notes Phased Plasma M “Phased Plasma M” Hurricane, Vagabond close range 0–8 km Best all-round brawling ammo. Thermal + kinetic damage. Buy 5,000 EMP M “EMP M” Hurricane close range vs shields 0–8 km EM + kinetic damage. Use against shield-tanked targets. Buy 5,000 Barrage M “Barrage M” Vagabond kiting, Hurricane falloff 15–30 km Lower damage but extended range. Your Vagabond default. Buy 10,000 Republic Fleet EMP M “Republic Fleet EMP M” Hurricane or Loki high-value fights 0–8 km Faction ammo — more expensive but noticeably more damage. Buy 2,000 Republic Fleet Phased Plasma M “Republic Fleet Phased Plasma M” Same as above 0–8 km Faction version — buy 2,000 for serious fights
Market category to find these: Market → Ammunition & Charges → Projectile Ammo → Medium Projectile Ammo
Total budget per shopping trip: Roughly 2–5 million ISK covers a full stock of all M ammo types.
Missile Ammo (for Drake and any missile ship)
Missiles are loaded into launchers one type at a time. Buy 2,000–5,000 per type.
Ammo Name Search For Use On Against Notes Scourge Rage HAM “Scourge Rage HAM” Drake, any HAM ship Angels, Serpentis Your default. Kinetic damage, maximum DPS, short range Inferno Rage HAM “Inferno Rage HAM” Drake Guristas, Caldari Thermal damage. Use against Caldari NPC factions Caldari Navy Scourge HAM “Caldari Navy Scourge HAM” Drake — when you need range Any Longer range than Rage, less damage. Buy 1,000 Mjolnir Rage HAM “Mjolnir Rage HAM” Drake Blood Raiders, Sansha EM damage for EM-weak enemies Nova Rage HAM “Nova Rage HAM” Drake Sansha, Blood Raiders Explosive damage backup
Market category: Market → Ammunition & Charges → Missiles → Heavy Assault Missiles
Rule of thumb: Always carry at least 3 damage types. You will fight different NPC factions and one type will not cover everything.
Drone Ammo
Drones do not use ammo — they are the weapon themselves. You launch them and they fly to the target. Buy the T2 versions.
Drone Search For Use On Notes Warrior II “Warrior II” Hurricane, Rapier, Vagabond Fast light drones. Excellent tracking — kills frigates Hobgoblin II “Hobgoblin II” Drake PvE Slightly more DPS than Warriors, slower Hammerhead II “Hammerhead II” Drake or Hurricane PvE Medium drones — best all-round PvE choice
Buy 5 of each (a full flight). Keep spares in your cargo — drones can be destroyed if the enemy targets them.
Market category: Market → Drones → Combat Drones → Light/Medium Scout Drones
xNightShadex — What to Buy and How Much
Laser Crystals (for Paladin and Absolution)
Laser crystals are reusable — they go into your laser turret and stay there. They degrade with use and eventually burn out, but one set lasts many hours of combat. You do not consume them quickly. Buy 4 of each (one per gun).
Crystal Name Search For Use On Range Notes Scorch L “Scorch L” Paladin (Mega Pulse Laser II) 50–70 km Your PRIMARY crystal. Long range, excellent damage. Always have these loaded Conflagration L “Conflagration L” Paladin close combat 0–15 km Maximum DPS at short range. Use when rats are right next to you Imperial Navy Multifrequency L “Imperial Navy Multifrequency L” Paladin mid-range 15–30 km High damage, shorter range than Scorch. Good all-rounder Imperial Navy Scorch L “Imperial Navy Scorch L” Paladin — best-in-slot long range 50–70 km Faction version of Scorch. Better damage. Buy when you can afford it Scorch M “Scorch M” Absolution (Medium Pulse Laser II) 35–50 km Same as Scorch L but medium size for the Absolution Conflagration M “Conflagration M” Absolution close range 0–10 km Maximum close-range DPS for the Absolution
Market category: Market → Ammunition & Charges → Frequency Crystals → Advanced Frequency Crystals (for Scorch/Conflagration) or Standard Frequency Crystals (for Multifrequency)
Important: Scorch and Conflagration are T2 crystals — they appear under Advanced Frequency Crystals. They degrade after roughly 1,000 shots. Buy 4 of each size and replace when they hit 0%.
Cost: Scorch L costs roughly 300–500k ISK each. Buy 8 (enough for two full swaps). Total cost is under 5 million ISK for a full set.
Cap Booster Charges (for Paladin — critical)
The Paladin’s Cap Booster II needs Navy Cap Booster 800 charges. These are consumed one at a time when you activate the booster. They are single-use and you need a lot of them.
Item Search For How Many to Buy Notes Navy Cap Booster 800 “Navy Cap Booster 800” 40–50 per mission run Each click of the booster consumes one. Buy in bulk — they are heavy Cap Booster 800 “Cap Booster 800” 20 as backup Standard version, slightly less cap restored. Cheaper
Market category: Market → Ammunition & Charges → Capacitor Charges → Cap Booster 800 / Navy Cap Booster 800
Weight warning: Cap boosters are heavy (3,000 m³ for 50 charges). Make sure your Paladin cargo can fit them. If you are running out of space, use Cap Booster 800 (lighter) instead.
Command Burst Charges (for Absolution)
The Absolution’s command bursts need charges to fire. Without charges loaded, the command burst does nothing.
Charge Search For Which Burst Notes Armor Reinforcement Charge “Armor Reinforcement Charge” Armor Command Burst I (slot 1) Increases fleet armour resistances. Buy 20 Armor Energising Charge “Armor Energising Charge” Armor Command Burst I (slot 2) Increases fleet armour repair rate. Buy 20
Market category: Market → Ammunition & Charges → Nanite Repair Paste & Command Bursts → Armor Command Burst Charges
Each charge lasts for one 30-second burst cycle. In a 30-minute fleet op you will use roughly 60 charges per burst type. Buy in bulk — they are cheap.
Nanite Repair Paste (for Loki’s Ancillary Armor Repairer)
The Medium Ancillary Armor Repairer on the Loki uses Nanite Repair Paste to fire burst repairs. Without paste loaded it still works, but with a very long reload cycle. Paste makes it fire multiple times quickly.
Item Search For How Many Notes Nanite Repair Paste “Nanite Repair Paste” 200–500 units Each burst repair consumes roughly 8 paste. Buy in bulk
Market category: Market → Ammunition & Charges → Nanite Repair Paste
Paste is used for overheating modules too — it repairs heat damage. Keep some in your cargo at all times regardless of what ship you are flying.
Drones (for Paladin, Loki, Guardian, Absolution)
Drone Ship Use Ogre II Paladin Heavy drones — maximum PvE DPS. Buy 5 + 5 spares Warrior II Loki Fast light drones for PvP. Buy 5 Hobgoblin II Guardian (self-defence) Buy 5 Hammerhead II Absolution Medium drones for fleet DPS. Buy 5 + 5 spares
Market category: Market → Drones → Combat Drones
Quick Shopping List — Print This Before You Go to Market
chronicbomb — One Shopping Run
Item Qty Approx Cost Phased Plasma M 5,000 ~500k ISK EMP M 5,000 ~500k ISK Barrage M 10,000 ~1.5m ISK Republic Fleet EMP M 2,000 ~4m ISK Scourge Rage HAM 2,000 ~3m ISK Inferno Rage HAM 1,000 ~1.5m ISK Caldari Navy Scourge HAM 1,000 ~2m ISK Warrior II 10 ~500k ISK Hobgoblin II 10 ~500k ISK Total ~14m ISK
xNightShadex — One Shopping Run
Item Qty Approx Cost Scorch L 8 ~3m ISK Conflagration L 8 ~3m ISK Imperial Navy Multifrequency L 8 ~2m ISK Scorch M 8 ~1m ISK Conflagration M 8 ~1m ISK Navy Cap Booster 800 50 ~5m ISK Armor Reinforcement Charge 30 ~1m ISK Armor Energising Charge 30 ~1m ISK Nanite Repair Paste 500 ~5m ISK Ogre II 10 ~5m ISK Warrior II 10 ~500k ISK Total ~27m ISK
Last updated April 2026 · Skills from EveLens 1.2.1 · Ship images via images.evetech.net (CCP official CDN) · Back to Guide
Supplies for Both Characters
Screams Eternal — What to Buy
She uses Heavy Missiles now, and will switch to Heavy Assault Missiles once trained.
Heavy Missiles (use these now)
Buy 2,000 of each from Jita or any Caldari trade hub. Heavy missiles are cheap — a full stock costs under 3 million ISK.
Ammo Search For Against Scourge Heavy Missile “Scourge Heavy Missile” Default — Serpentis, mixed Inferno Heavy Missile “Inferno Heavy Missile” Guristas, Caldari rats Mjolnir Heavy Missile “Mjolnir Heavy Missile” Blood Raiders, Sansha Nova Heavy Missile “Nova Heavy Missile” Angel Cartel
Market category: Market → Ammunition & Charges → Missiles → Heavy Missiles
Heavy Assault Missiles (train these first, then buy)
Once Heavy Assault Missiles is trained, switch to these — more DPS, shorter range.
Ammo Search For Against Scourge Rage HAM “Scourge Rage HAM” Default — maximum damage Inferno Rage HAM “Inferno Rage HAM” Guristas Mjolnir Rage HAM “Mjolnir Rage HAM” Blood Raiders / Sansha
Buy 2,000 of each. Market category: Market → Ammunition & Charges → Missiles → Heavy Assault Missiles
Drones
Drone Buy Why Hobgoblin I 10 Current drone — cheap, available now Hobgoblin II 10 Upgrade when budget allows
Lady Damnation — What to Buy
Lady Damnation does not use weapons, but she needs:
Manufacturing Inputs
These are not bought from the player market normally — they come from her own production chain:
Item How to Get Purpose Minerals (Tritanium, Pyerite, etc.) Mine ore → Reprocess, or buy directly from market Raw material for all manufacturing Blueprint Originals NPC market → search item name → find NPC sell orders Templates for manufacturing
How to find BPOs on the market: Press M → search the item you want to make (e.g. “Hobgoblin II”) → right side shows sell orders → look for orders sold by NPC corporations (they appear in the NPC order list in any station with a school or factory).
Hauling Supplies
Item Search For Why Expanded Cargohold II “Expanded Cargohold II” Maximum cargo on the Iteron Damage Control I “Damage Control I” Minimal tank — keeps her alive Cargohold Optimization Rig “Medium Cargohold Optimization I” Cargo rigs — install once, permanent
Quick Buy List
Screams Eternal
Item Qty Cost Scourge Heavy Missile 2,000 ~300k ISK Inferno Heavy Missile 2,000 ~300k ISK Mjolnir Heavy Missile 2,000 ~300k ISK Nova Heavy Missile 2,000 ~300k ISK Hobgoblin I 10 ~50k ISK Ballistic Control System I 2 ~200k ISK Total ~1.5m ISK
Lady Damnation
Item Qty Cost Expanded Cargohold II 3 ~2m ISK Medium Cargohold Optimization I 3 ~1.5m ISK Damage Control I 1 ~50k ISK Tritanium (for manufacturing) 500,000 units ~3–5m ISK Total ~8m ISK
Who Makes Money Faster?
Lady Damnation wins — and it isn’t close
Lady Damnation will make ISK faster than Screams Eternal. Here is exactly why, and exactly what to do.
Why Lady Damnation Is Faster
Screams Eternal earns ISK by actively playing — flying to a site, shooting enemies, waiting for them to respawn, managing her tank, collecting loot. She has to be at the keyboard. If she logs off, the ISK stops.
Lady Damnation earns ISK from manufacturing jobs that run while she is logged off. With Industry 5 and 5 simultaneous job slots, she installs jobs before bed and collects finished goods in the morning. The ISK compounds automatically.
Screams Eternal Lady Damnation ISK method Combat sites, missions Manufacturing, reprocessing Requires being online Yes — actively flying No — jobs run offline Scales with time Linear — more hours = more ISK Exponential — more jobs, more BPOs Risk Ship loss possible Essentially zero risk Starting cost Low Low (one BPO) Skill ceiling High — but takes time to train Already at it — Industry 5 is done
The Fastest Starting Move — Do This Today
Step 1 — Go to Jita
Fly Lady Damnation to Jita 4-4 (The Forge region). This is the largest market in the game and has everything she needs.
Step 2 — Buy a Blueprint Original
Press M to open the market. In the search bar type:
Hobgoblin II
On the right side of the market window, look for sell orders from NPC corporations — these are the official blueprint sell orders. They cost roughly 5–10 million ISK and are permanent — you never need to buy them again.
Why Hobgoblin IIs specifically:
- Every combat pilot in EVE uses them
- They get destroyed constantly and need replacing
- High demand, fast turnover, reliable price
- Lady Damnation already has the skills to manufacture them immediately
Step 3 — Research the Blueprint First
Before manufacturing anything, research the blueprint to reduce material waste:
- Right-click the BPO → Research
- Select Material Efficiency research
- Find a station with open research slots (most NPC stations have them)
- Install research to ME level 10 — this takes a few days but saves minerals on every single job forever after
While that researches, buy minerals (see Step 4).
Step 4 — Buy Minerals
The Hobgoblin II requires these minerals to build. Buy them all from the Jita market:
Mineral Search For Approx Cost per 100 drones Tritanium “Tritanium” ~500k ISK Pyerite “Pyerite” ~200k ISK Mexallon “Mexallon” ~300k ISK Isogen “Isogen” ~400k ISK Nocxium “Nocxium” ~500k ISK Zydrine “Zydrine” ~600k ISK Megacyte “Megacyte” ~800k ISK
Exact quantities are shown in the blueprint when you hover over it. Start with enough for 100 drones — roughly 3–5 million ISK in minerals total.
Market category for minerals: Market → Trade Goods → Minerals
Step 5 — Install Manufacturing Jobs
- Be in a station with manufacturing slots (any NPC station works)
- Right-click the BPO → Manufacture
- Set the run count to as many as your minerals allow
- Confirm — job starts immediately
- With Mass Production 3 she can run 5 jobs at once — install 5 different runs or 5 different blueprints
Step 6 — Collect and Sell
When the jobs complete:
- Right-click the finished drones → Sell
- Check the current sell price (look at existing buy orders for instant sale, or post your own sell order slightly below the lowest seller for faster movement)
- Reinvest the ISK into more minerals and more BPOs
Scaling Up
Once the first BPO is running, add more:
BPO to Buy Next Why Warrior II Fast light drones — also high demand, same buyer pool Scourge Heavy Missile Missiles are consumed constantly — zero waste market Hobgoblin I Cheaper, faster to make, huge volume Medium Shield Extender II High-value module, slower turnover but bigger margin
Each new BPO is another income stream running in parallel. With Mass Production 5 (7 job slots) she eventually runs 7 different products simultaneously, all generating ISK while she is offline.
What Screams Eternal Should Do For ISK In The Meantime
Screams Eternal is not an ISK-printer yet, but she can make steady income:
- Run level 2 security missions from a Caldari agent — she has the Drake and the missile skills
- Open the Agency (Alt+N) → Security Missions → find a level 2 agent near her current location
- Each mission takes 10–20 minutes and pays 500k–2m ISK in bounties and rewards
- Collect and sell the loot — everything that drops from rats can be sold at the nearest trade hub
- Do not try level 4 missions yet — her tank is not strong enough without more shield skills
Once she trains Heavy Assault Missiles and Caldari Battlecruiser 5, her Drake DPS improves significantly and level 3 missions become fast and easy.
Last updated April 2026 · Skills from EveLens 1.2.1 · Ship images via images.evetech.net (CCP official CDN) · Back to Main Profiles · Back to Guide
Last updated April 2026 · Skills from EveLens 1.2.1 · Ship images via images.evetech.net (CCP official CDN) · Back to Guide
| Skill | Level |
|---|---|
| EM Armor Compensation | 2 |
| Explosive Armor Compensation | 2 |
| Hull Upgrades | 4 |
| Kinetic Armor Compensation | 2 |
| Mechanics | 5 |
| Repair Systems | 3 |
| Thermal Armor Compensation | 2 |
| Corporation Management | 3 |
| Diplomatic Relations | 3 |
| Drones | 3 |
| Mining Drone Operation | 1 |
| Capacitor Systems Operation | 3 |
| Energy Grid Upgrades | 2 |
| Power Grid Management | 5 |
| Gunnery | 1 |
| Small Hybrid Turret | 1 |
| Cybernetics | 1 |
| Infomorph Psychology | 1 |
| Advanced Industry | 4 |
| Industry | 5 |
| Mass Production | 3 (training → 4) |
| Mining | 4 |
| Reprocessing | 5 |
| Laboratory Operation | 3 |
| Research | 4 |
| Science | 4 |
| Social | 3 |
| Gallente Frigate | 3 |
| Gallente Hauler | 5 |
| Spaceship Command | 5 |
| Anchoring | 1 |
| Trade | 2 |
| Race | Minmatar — Sebiestor |
| Security Status | −1.02 — low-sec veteran |
| Current Ship | Drake |
| Free Skill Points | 256,033 — spend on Command Ships now |
| Best At | Solo PvP, small-gang roaming, missile DPS, covert tackle |
Hurricane — Minmatar Battlecruiser
[Hurricane, chronicbomb Solo PvP]
HIGH SLOTS
425mm AutoCannon II x6
'Arbalest' Assault Missile Launcher x2
MID SLOTS
50MN Quad LiF Restrained Microwarpdrive
Warp Disruptor II
Medium Shield Extender II
Invulnerability Field II
LOW SLOTS
Damage Control II
Gyrostabilizer II x2
Nanofiber Internal Structure II x2
RIGS
Medium Core Defense Field Extender I x2
Medium Projectile Collision Accelerator I
DRONES
Warrior II x5 (fast light drones for tackle and small ships)
AMMO TO CARRY
Phased Plasma M — close range, max damage vs armour
EMP M — close range, max damage vs shield
Barrage M — long range, 20–30 km falloff, reduced damage
Republic Fleet EMP M — faction ammo for when you need that extra bite
- Orbiting creates angular velocity — this makes you harder to hit by large guns
- 500 m is tight enough that your autocannons track perfectly
| Situation | What to Do |
|---|---|
| Target is pulling range past 10 km | Switch ammo to Barrage M, keep orbiting |
| A hostile frigate is tackling you | Send drones onto it — Warrior IIs kill frigates fast |
| Your shields drop below 30% | Overheat your shield extender (right-click → Overheat) for extra HP |
| You need to escape | Overheat your MWD, burn away in a straight line, warp out when disruptor range drops |
| Target has very high armour resist | Swap from Phased Plasma M to EMP M for the EM damage |
| Range to Target | Load This | Why |
|---|---|---|
| 0–5 km | Phased Plasma M | Max thermal/kinetic damage up close |
| 5–20 km | EMP M | EM damage hits well at this range |
| 20–30 km | Barrage M | Extended falloff, keeps damage applying |
Drake — Caldari Battlecruiser
[Drake, chronicbomb PvE]
HIGH SLOTS
Heavy Assault Missile Launcher II x7
MID SLOTS
Large Shield Extender II x2
Invulnerability Field II
EM Ward Field II
50MN Microwarpdrive II
LOW SLOTS
Ballistic Control System II x3
Damage Control II
RIGS
Medium Core Defense Field Extender I x2
Medium Anti-EM Screen Reinforcer I
DRONES
Hobgoblin II x5 (medium damage, good for frigates)
AMMO TO CARRY
Scourge Rage HAM — max damage, short range (under 20 km) — use this most of the time
Caldari Navy Scourge HAM — longer range, slightly less damage
Inferno Rage HAM — thermal damage for Guristas/Caldari rats
- Angel Cartel / Minmatar rats → Scourge (kinetic) or Explosive
- Guristas / Caldari rats → Inferno (thermal) or Kinetic
- Sansha / Blood Raiders → EM or Thermal
- Serpentis → Kinetic or Thermal
- This keeps you in HAM range while maintaining some speed
Vagabond — Minmatar Heavy Assault Cruiser (T2)
[Vagabond, chronicbomb Roaming PvP]
HIGH SLOTS
220mm Autocannon II x5
MID SLOTS
50MN Quad LiF Restrained Microwarpdrive
Warp Disruptor II
Medium Shield Extender II
Invulnerability Field II
LOW SLOTS
Gyrostabilizer II x2
Damage Control II
Nanofiber Internal Structure II x2
RIGS
Medium Projectile Collision Accelerator I
Medium Core Defense Field Extender I x2
DRONES
Warrior II x5
AMMO TO CARRY
Barrage M — your PRIMARY ammo — load this before every fight
Republic Fleet EMP M — close range burst if target is webbed and not moving
Phased Plasma M — close range backup
Never orbit below 15 km. Never stop your MWD. If someone webs you, warp out immediately.
| Situation | What to Do |
|---|---|
| Target tries to close range (burning at you) | Immediately increase orbit to 25,000 m — stay at the edge of disruptor range |
| Target is a slow battleship | Drop to 15,000 m orbit for better damage application |
| Target launches drones that chase you | Your speed outpaces most drones — if not, recall your drones and kite the enemy drones away |
| A second enemy lands on grid | Evaluate: if they are fast, warp out. Do not let yourself get caught |
| Target tries to warp | Keep disruptor active — check it every 10 seconds |
| Your orbit | Damage application | Risk |
|---|---|---|
| 5 km | Max damage — but they can hit you | Very high |
| 15 km | Very good — Barrage M falloff | Low |
| 20 km | Good — comfortable kiting range | Very low |
| 30 km | Reduced — approaching Barrage max falloff | Escape range |
Rapier — Minmatar Force Recon (T2)
[Rapier, chronicbomb Fleet Tackle]
HIGH SLOTS
Covert Ops Cloaking Device II
Sisters Core Probe Launcher (Sisters Core Scanner Probes)
MID SLOTS
50MN Quad LiF Restrained Microwarpdrive
Warp Disruptor II
Stasis Webifier II x2
LOW SLOTS
Damage Control II
Nanofiber Internal Structure II x2
RIGS
Medium Low Friction Nozzle Joints I
Medium Auxiliary Thrusters I
Medium Anti-EM Screen Reinforcer I
DRONES
Warrior II x5 (self-defence only — you are not a DPS ship)
- The Covert Ops Cloak lets you warp while cloaked — this is your superpower
- Warp Disruptor → click target
- Stasis Webifier → click target
- Second Stasis Webifier → click target
- MWD → click activate
| Situation | What to Do |
|---|---|
| Target tries to burn away | Keep orbit at 5 km — you are faster than them with webs applied |
| Target shoots you | Orbit tightly at 2,500 m — smaller orbit = harder to track |
| Target has support frigates | Launch Warrior IIs on the closest frigate to you |
| Target is about to die | Keep tackle active until it explodes — do not release early |
| You are being primaried (taking heavy damage) | Warp out — a live Rapier is more valuable than a dead one |
Sleipnir — Minmatar Command Ship (T2) Train Command Ships V. Everything else is already done.
| Race | Caldari — Civire |
| Born | Christmas Day, 2008 |
| Corporation | State War Academy |
| Current Ship | Drake (Sydney) |
| Security Status | 0.0 — clean slate |
| Attributes | Perception 24, Willpower 24 — perfect for weapon skills |
| Free Skill Points | 0 |
| Skill Queue | Empty — needs a plan |
Drake — Caldari Battlecruiser The right ship for where she is right now
[Drake, Screams Eternal — PvE Starter]
HIGH SLOTS
Heavy Missile Launcher II x7
(upgrade from T1 launchers when you can — needs Missile Launcher Op 5 ✅)
MID SLOTS
Large Shield Extender II
Invulnerability Field II
Shield Boost Amplifier I (or second LSE when you can fit it)
EM Ward Field I
50MN Afterburner II
LOW SLOTS
Ballistic Control System II x2 (or T1 versions — BCS I — until you can afford T2)
Damage Control I
RIGS
Medium Core Defense Field Extender I x2
Medium Anti-EM Screen Reinforcer I
DRONES
Hobgoblin I x5 (light combat drones, kills frigates)
AMMO TO CARRY
Scourge Heavy Missile — your default, kinetic damage, all-round use
Inferno Heavy Missile — thermal damage for Guristas rats
Mjolnir Heavy Missile — EM damage for Blood Raiders / Sansha rats
Nova Heavy Missile — explosive damage for Angel Cartel rats
Note: She has Heavy Missiles 5 but she does NOT yet have Heavy Assault Missiles trained. Use Heavy Missiles (not HAMs) for now. The range is better and they still hit hard.
| Enemy | Ammo to Use | Damage Type |
|---|---|---|
| Guristas (Caldari rats) | Inferno Heavy Missile | Thermal |
| Blood Raiders | Mjolnir Heavy Missile | EM |
| Sansha’s Nation | Mjolnir Heavy Missile | EM |
| Angel Cartel | Nova Heavy Missile | Explosive |
| Serpentis | Scourge Heavy Missile | Kinetic |
| Unknown / Mixed | Scourge Heavy Missile | Kinetic |
| Shield % | Action |
|---|---|
| 100%–50% | Normal — you are fine |
| 50%–30% | Check how many enemies are left — if few, keep going |
| Below 30% | Warp out immediately to a station or safe bookmark |
| Priority | Skill | Train To | Why |
|---|---|---|---|
| 1 | Heavy Assault Missiles | Level 5 | Unlocks HAMs — shorter range but significantly more DPS than Heavy Missiles. Essential for the Drake. |
| 2 | Caldari Battlecruiser | Level 5 | Improves Drake performance — more launcher hardpoints and better bonuses at 5 |
| 3 | Shield Management | Level 4 | More total shield HP — makes the Drake harder to kill |
| 4 | Caldari Battleship | Level 1 → 3 | Unlocks the Raven — her long-term goal |
| 5 | Missile Bombardment | Already 5 ✅ | Done |
| 6 | Target Navigation Prediction | Level 4 | Helps missiles hit moving targets — important for PvP later |
| 7 | Rapid Launch | Level 4 | Faster missile launch rate — more DPS |
Raven — Caldari Battleship The natural next step after the Drake — a bigger, harder-hitting missile platform
[Raven, Screams Eternal — L4 Missions]
HIGH SLOTS
Cruise Missile Launcher II x6
Cruise Missile Launcher II x1 (or Heavy Neutraliser for utility)
MID SLOTS
Large Shield Extender II x2
Invulnerability Field II x2
EM Ward Field II
Cap Recharger II
LOW SLOTS
Ballistic Control System II x3
Damage Control II
RIGS
Large Core Defense Field Extender I x2
Large Anti-EM Screen Reinforcer I
DRONES
Hobgoblin II x5
Click to expand</summary>
Skill Level Mechanics 3 Drone Avionics 1 Drones 1 Light Drone Operation 1 Medium Drone Operation 1 Electronic Warfare 2 Capacitor Systems Operation 3 CPU Management 4 Electronics Upgrades 1 Energy Grid Upgrades 4 Power Grid Management 4 Gunnery 3 Sharpshooter 2 Small Hybrid Turret 3 Defender Missiles 2 Heavy Missile Specialization 1 Heavy Missiles 5 Light Missiles 4 Missile Bombardment 5 Missile Launcher Operation 5 Afterburner 4 Navigation 1 Cybernetics 1 Mining 1 Survey 1 Science 3 Shield Compensation 3 Shield Emission Systems 4 Shield Operation 4 Shield Upgrades 4 Tactical Shield Manipulation 4 Caldari Battlecruiser 4 Caldari Battleship 0 (book owned) Caldari Cruiser 4 Caldari Frigate 4 Spaceship Command 5
</details>
Side by Side
chronicbomb xNightShadex Fly right now for ISK Drake — HAM missions Paladin — L4 missions Fly right now for PvP Hurricane or Vagabond Loki Fly right now for fleet Rapier (tackle) Guardian (logi) or Absolution (command) One train away from Sleipnir Revelation dreadnought Sec Status −1.02 (can enter low-sec freely) +2.34 (stays green) Free SP 256,033 — spend on Command Ships 0
Ammo & Market Buying Guide
chronicbomb is based at Rens (Minmatar trade hub). xNightShadex is based at Amarr (Amarr trade hub). Everything below can be bought at either hub — or in bulk at Jita 4-4 which has the largest market in the game.
How to Buy Ammo in EVE
- Press M to open the Market
- Use the search bar at the top — search the exact ammo name
- Click Buy tab on the right side
- Find the cheapest listing in your current station or nearby systems
- Right-click a listing → Buy This → set quantity → confirm
Where to shop:
Hub Location Best For Jita 4-4 (Caldari Navy Assembly Plant) The Forge region Everything — biggest market, lowest prices Rens (Brutor Tribe Treasury) Heimatar region Minmatar ammo, projectile modules — chronicbomb’s home Amarr (Emperor Family Academy) Domain region Laser crystals, armour modules — xNightShadex’s home
If something is out of stock locally, check Jita. It is almost never out of stock and prices are usually 5–10% cheaper than regional hubs.
chronicbomb — What to Buy and How Much
Projectile Ammo (for Hurricane and Vagabond)
Projectile ammo is physical rounds — they sit in your cargo and are consumed when you fire. Buy in batches of 5,000–10,000 rounds per type. They are cheap and light.
Ammo Name Search For Use On Range Notes Phased Plasma M “Phased Plasma M” Hurricane, Vagabond close range 0–8 km Best all-round brawling ammo. Thermal + kinetic damage. Buy 5,000 EMP M “EMP M” Hurricane close range vs shields 0–8 km EM + kinetic damage. Use against shield-tanked targets. Buy 5,000 Barrage M “Barrage M” Vagabond kiting, Hurricane falloff 15–30 km Lower damage but extended range. Your Vagabond default. Buy 10,000 Republic Fleet EMP M “Republic Fleet EMP M” Hurricane or Loki high-value fights 0–8 km Faction ammo — more expensive but noticeably more damage. Buy 2,000 Republic Fleet Phased Plasma M “Republic Fleet Phased Plasma M” Same as above 0–8 km Faction version — buy 2,000 for serious fights
Market category to find these: Market → Ammunition & Charges → Projectile Ammo → Medium Projectile Ammo
Total budget per shopping trip: Roughly 2–5 million ISK covers a full stock of all M ammo types.
Missile Ammo (for Drake and any missile ship)
Missiles are loaded into launchers one type at a time. Buy 2,000–5,000 per type.
Ammo Name Search For Use On Against Notes Scourge Rage HAM “Scourge Rage HAM” Drake, any HAM ship Angels, Serpentis Your default. Kinetic damage, maximum DPS, short range Inferno Rage HAM “Inferno Rage HAM” Drake Guristas, Caldari Thermal damage. Use against Caldari NPC factions Caldari Navy Scourge HAM “Caldari Navy Scourge HAM” Drake — when you need range Any Longer range than Rage, less damage. Buy 1,000 Mjolnir Rage HAM “Mjolnir Rage HAM” Drake Blood Raiders, Sansha EM damage for EM-weak enemies Nova Rage HAM “Nova Rage HAM” Drake Sansha, Blood Raiders Explosive damage backup
Market category: Market → Ammunition & Charges → Missiles → Heavy Assault Missiles
Rule of thumb: Always carry at least 3 damage types. You will fight different NPC factions and one type will not cover everything.
Drone Ammo
Drones do not use ammo — they are the weapon themselves. You launch them and they fly to the target. Buy the T2 versions.
Drone Search For Use On Notes Warrior II “Warrior II” Hurricane, Rapier, Vagabond Fast light drones. Excellent tracking — kills frigates Hobgoblin II “Hobgoblin II” Drake PvE Slightly more DPS than Warriors, slower Hammerhead II “Hammerhead II” Drake or Hurricane PvE Medium drones — best all-round PvE choice
Buy 5 of each (a full flight). Keep spares in your cargo — drones can be destroyed if the enemy targets them.
Market category: Market → Drones → Combat Drones → Light/Medium Scout Drones
xNightShadex — What to Buy and How Much
Laser Crystals (for Paladin and Absolution)
Laser crystals are reusable — they go into your laser turret and stay there. They degrade with use and eventually burn out, but one set lasts many hours of combat. You do not consume them quickly. Buy 4 of each (one per gun).
Crystal Name Search For Use On Range Notes Scorch L “Scorch L” Paladin (Mega Pulse Laser II) 50–70 km Your PRIMARY crystal. Long range, excellent damage. Always have these loaded Conflagration L “Conflagration L” Paladin close combat 0–15 km Maximum DPS at short range. Use when rats are right next to you Imperial Navy Multifrequency L “Imperial Navy Multifrequency L” Paladin mid-range 15–30 km High damage, shorter range than Scorch. Good all-rounder Imperial Navy Scorch L “Imperial Navy Scorch L” Paladin — best-in-slot long range 50–70 km Faction version of Scorch. Better damage. Buy when you can afford it Scorch M “Scorch M” Absolution (Medium Pulse Laser II) 35–50 km Same as Scorch L but medium size for the Absolution Conflagration M “Conflagration M” Absolution close range 0–10 km Maximum close-range DPS for the Absolution
Market category: Market → Ammunition & Charges → Frequency Crystals → Advanced Frequency Crystals (for Scorch/Conflagration) or Standard Frequency Crystals (for Multifrequency)
Important: Scorch and Conflagration are T2 crystals — they appear under Advanced Frequency Crystals. They degrade after roughly 1,000 shots. Buy 4 of each size and replace when they hit 0%.
Cost: Scorch L costs roughly 300–500k ISK each. Buy 8 (enough for two full swaps). Total cost is under 5 million ISK for a full set.
Cap Booster Charges (for Paladin — critical)
The Paladin’s Cap Booster II needs Navy Cap Booster 800 charges. These are consumed one at a time when you activate the booster. They are single-use and you need a lot of them.
Item Search For How Many to Buy Notes Navy Cap Booster 800 “Navy Cap Booster 800” 40–50 per mission run Each click of the booster consumes one. Buy in bulk — they are heavy Cap Booster 800 “Cap Booster 800” 20 as backup Standard version, slightly less cap restored. Cheaper
Market category: Market → Ammunition & Charges → Capacitor Charges → Cap Booster 800 / Navy Cap Booster 800
Weight warning: Cap boosters are heavy (3,000 m³ for 50 charges). Make sure your Paladin cargo can fit them. If you are running out of space, use Cap Booster 800 (lighter) instead.
Command Burst Charges (for Absolution)
The Absolution’s command bursts need charges to fire. Without charges loaded, the command burst does nothing.
Charge Search For Which Burst Notes Armor Reinforcement Charge “Armor Reinforcement Charge” Armor Command Burst I (slot 1) Increases fleet armour resistances. Buy 20 Armor Energising Charge “Armor Energising Charge” Armor Command Burst I (slot 2) Increases fleet armour repair rate. Buy 20
Market category: Market → Ammunition & Charges → Nanite Repair Paste & Command Bursts → Armor Command Burst Charges
Each charge lasts for one 30-second burst cycle. In a 30-minute fleet op you will use roughly 60 charges per burst type. Buy in bulk — they are cheap.
Nanite Repair Paste (for Loki’s Ancillary Armor Repairer)
The Medium Ancillary Armor Repairer on the Loki uses Nanite Repair Paste to fire burst repairs. Without paste loaded it still works, but with a very long reload cycle. Paste makes it fire multiple times quickly.
Item Search For How Many Notes Nanite Repair Paste “Nanite Repair Paste” 200–500 units Each burst repair consumes roughly 8 paste. Buy in bulk
Market category: Market → Ammunition & Charges → Nanite Repair Paste
Paste is used for overheating modules too — it repairs heat damage. Keep some in your cargo at all times regardless of what ship you are flying.
Drones (for Paladin, Loki, Guardian, Absolution)
Drone Ship Use Ogre II Paladin Heavy drones — maximum PvE DPS. Buy 5 + 5 spares Warrior II Loki Fast light drones for PvP. Buy 5 Hobgoblin II Guardian (self-defence) Buy 5 Hammerhead II Absolution Medium drones for fleet DPS. Buy 5 + 5 spares
Market category: Market → Drones → Combat Drones
Quick Shopping List — Print This Before You Go to Market
chronicbomb — One Shopping Run
Item Qty Approx Cost Phased Plasma M 5,000 ~500k ISK EMP M 5,000 ~500k ISK Barrage M 10,000 ~1.5m ISK Republic Fleet EMP M 2,000 ~4m ISK Scourge Rage HAM 2,000 ~3m ISK Inferno Rage HAM 1,000 ~1.5m ISK Caldari Navy Scourge HAM 1,000 ~2m ISK Warrior II 10 ~500k ISK Hobgoblin II 10 ~500k ISK Total ~14m ISK
xNightShadex — One Shopping Run
Item Qty Approx Cost Scorch L 8 ~3m ISK Conflagration L 8 ~3m ISK Imperial Navy Multifrequency L 8 ~2m ISK Scorch M 8 ~1m ISK Conflagration M 8 ~1m ISK Navy Cap Booster 800 50 ~5m ISK Armor Reinforcement Charge 30 ~1m ISK Armor Energising Charge 30 ~1m ISK Nanite Repair Paste 500 ~5m ISK Ogre II 10 ~5m ISK Warrior II 10 ~500k ISK Total ~27m ISK
Last updated April 2026 · Skills from EveLens 1.2.1 · Ship images via images.evetech.net (CCP official CDN) · Back to Guide
Supplies for Both Characters
Screams Eternal — What to Buy
She uses Heavy Missiles now, and will switch to Heavy Assault Missiles once trained.
Heavy Missiles (use these now)
Buy 2,000 of each from Jita or any Caldari trade hub. Heavy missiles are cheap — a full stock costs under 3 million ISK.
Ammo Search For Against Scourge Heavy Missile “Scourge Heavy Missile” Default — Serpentis, mixed Inferno Heavy Missile “Inferno Heavy Missile” Guristas, Caldari rats Mjolnir Heavy Missile “Mjolnir Heavy Missile” Blood Raiders, Sansha Nova Heavy Missile “Nova Heavy Missile” Angel Cartel
Market category: Market → Ammunition & Charges → Missiles → Heavy Missiles
Heavy Assault Missiles (train these first, then buy)
Once Heavy Assault Missiles is trained, switch to these — more DPS, shorter range.
Ammo Search For Against Scourge Rage HAM “Scourge Rage HAM” Default — maximum damage Inferno Rage HAM “Inferno Rage HAM” Guristas Mjolnir Rage HAM “Mjolnir Rage HAM” Blood Raiders / Sansha
Buy 2,000 of each. Market category: Market → Ammunition & Charges → Missiles → Heavy Assault Missiles
Drones
Drone Buy Why Hobgoblin I 10 Current drone — cheap, available now Hobgoblin II 10 Upgrade when budget allows
Lady Damnation — What to Buy
Lady Damnation does not use weapons, but she needs:
Manufacturing Inputs
These are not bought from the player market normally — they come from her own production chain:
Item How to Get Purpose Minerals (Tritanium, Pyerite, etc.) Mine ore → Reprocess, or buy directly from market Raw material for all manufacturing Blueprint Originals NPC market → search item name → find NPC sell orders Templates for manufacturing
How to find BPOs on the market: Press M → search the item you want to make (e.g. “Hobgoblin II”) → right side shows sell orders → look for orders sold by NPC corporations (they appear in the NPC order list in any station with a school or factory).
Hauling Supplies
Item Search For Why Expanded Cargohold II “Expanded Cargohold II” Maximum cargo on the Iteron Damage Control I “Damage Control I” Minimal tank — keeps her alive Cargohold Optimization Rig “Medium Cargohold Optimization I” Cargo rigs — install once, permanent
Quick Buy List
Screams Eternal
Item Qty Cost Scourge Heavy Missile 2,000 ~300k ISK Inferno Heavy Missile 2,000 ~300k ISK Mjolnir Heavy Missile 2,000 ~300k ISK Nova Heavy Missile 2,000 ~300k ISK Hobgoblin I 10 ~50k ISK Ballistic Control System I 2 ~200k ISK Total ~1.5m ISK
Lady Damnation
Item Qty Cost Expanded Cargohold II 3 ~2m ISK Medium Cargohold Optimization I 3 ~1.5m ISK Damage Control I 1 ~50k ISK Tritanium (for manufacturing) 500,000 units ~3–5m ISK Total ~8m ISK
Who Makes Money Faster?
Lady Damnation wins — and it isn’t close
Lady Damnation will make ISK faster than Screams Eternal. Here is exactly why, and exactly what to do.
Why Lady Damnation Is Faster
Screams Eternal earns ISK by actively playing — flying to a site, shooting enemies, waiting for them to respawn, managing her tank, collecting loot. She has to be at the keyboard. If she logs off, the ISK stops.
Lady Damnation earns ISK from manufacturing jobs that run while she is logged off. With Industry 5 and 5 simultaneous job slots, she installs jobs before bed and collects finished goods in the morning. The ISK compounds automatically.
Screams Eternal Lady Damnation ISK method Combat sites, missions Manufacturing, reprocessing Requires being online Yes — actively flying No — jobs run offline Scales with time Linear — more hours = more ISK Exponential — more jobs, more BPOs Risk Ship loss possible Essentially zero risk Starting cost Low Low (one BPO) Skill ceiling High — but takes time to train Already at it — Industry 5 is done
The Fastest Starting Move — Do This Today
Step 1 — Go to Jita
Fly Lady Damnation to Jita 4-4 (The Forge region). This is the largest market in the game and has everything she needs.
Step 2 — Buy a Blueprint Original
Press M to open the market. In the search bar type:
Hobgoblin II
On the right side of the market window, look for sell orders from NPC corporations — these are the official blueprint sell orders. They cost roughly 5–10 million ISK and are permanent — you never need to buy them again.
Why Hobgoblin IIs specifically:
- Every combat pilot in EVE uses them
- They get destroyed constantly and need replacing
- High demand, fast turnover, reliable price
- Lady Damnation already has the skills to manufacture them immediately
Step 3 — Research the Blueprint First
Before manufacturing anything, research the blueprint to reduce material waste:
- Right-click the BPO → Research
- Select Material Efficiency research
- Find a station with open research slots (most NPC stations have them)
- Install research to ME level 10 — this takes a few days but saves minerals on every single job forever after
While that researches, buy minerals (see Step 4).
Step 4 — Buy Minerals
The Hobgoblin II requires these minerals to build. Buy them all from the Jita market:
Mineral Search For Approx Cost per 100 drones Tritanium “Tritanium” ~500k ISK Pyerite “Pyerite” ~200k ISK Mexallon “Mexallon” ~300k ISK Isogen “Isogen” ~400k ISK Nocxium “Nocxium” ~500k ISK Zydrine “Zydrine” ~600k ISK Megacyte “Megacyte” ~800k ISK
Exact quantities are shown in the blueprint when you hover over it. Start with enough for 100 drones — roughly 3–5 million ISK in minerals total.
Market category for minerals: Market → Trade Goods → Minerals
Step 5 — Install Manufacturing Jobs
- Be in a station with manufacturing slots (any NPC station works)
- Right-click the BPO → Manufacture
- Set the run count to as many as your minerals allow
- Confirm — job starts immediately
- With Mass Production 3 she can run 5 jobs at once — install 5 different runs or 5 different blueprints
Step 6 — Collect and Sell
When the jobs complete:
- Right-click the finished drones → Sell
- Check the current sell price (look at existing buy orders for instant sale, or post your own sell order slightly below the lowest seller for faster movement)
- Reinvest the ISK into more minerals and more BPOs
Scaling Up
Once the first BPO is running, add more:
BPO to Buy Next Why Warrior II Fast light drones — also high demand, same buyer pool Scourge Heavy Missile Missiles are consumed constantly — zero waste market Hobgoblin I Cheaper, faster to make, huge volume Medium Shield Extender II High-value module, slower turnover but bigger margin
Each new BPO is another income stream running in parallel. With Mass Production 5 (7 job slots) she eventually runs 7 different products simultaneously, all generating ISK while she is offline.
What Screams Eternal Should Do For ISK In The Meantime
Screams Eternal is not an ISK-printer yet, but she can make steady income:
- Run level 2 security missions from a Caldari agent — she has the Drake and the missile skills
- Open the Agency (Alt+N) → Security Missions → find a level 2 agent near her current location
- Each mission takes 10–20 minutes and pays 500k–2m ISK in bounties and rewards
- Collect and sell the loot — everything that drops from rats can be sold at the nearest trade hub
- Do not try level 4 missions yet — her tank is not strong enough without more shield skills
Once she trains Heavy Assault Missiles and Caldari Battlecruiser 5, her Drake DPS improves significantly and level 3 missions become fast and easy.
Last updated April 2026 · Skills from EveLens 1.2.1 · Ship images via images.evetech.net (CCP official CDN) · Back to Main Profiles · Back to Guide
Last updated April 2026 · Skills from EveLens 1.2.1 · Ship images via images.evetech.net (CCP official CDN) · Back to Guide
| Skill | Level |
|---|---|
| Mechanics | 3 |
| Drone Avionics | 1 |
| Drones | 1 |
| Light Drone Operation | 1 |
| Medium Drone Operation | 1 |
| Electronic Warfare | 2 |
| Capacitor Systems Operation | 3 |
| CPU Management | 4 |
| Electronics Upgrades | 1 |
| Energy Grid Upgrades | 4 |
| Power Grid Management | 4 |
| Gunnery | 3 |
| Sharpshooter | 2 |
| Small Hybrid Turret | 3 |
| Defender Missiles | 2 |
| Heavy Missile Specialization | 1 |
| Heavy Missiles | 5 |
| Light Missiles | 4 |
| Missile Bombardment | 5 |
| Missile Launcher Operation | 5 |
| Afterburner | 4 |
| Navigation | 1 |
| Cybernetics | 1 |
| Mining | 1 |
| Survey | 1 |
| Science | 3 |
| Shield Compensation | 3 |
| Shield Emission Systems | 4 |
| Shield Operation | 4 |
| Shield Upgrades | 4 |
| Tactical Shield Manipulation | 4 |
| Caldari Battlecruiser | 4 |
| Caldari Battleship | 0 (book owned) |
| Caldari Cruiser | 4 |
| Caldari Frigate | 4 |
| Spaceship Command | 5 |
| chronicbomb | xNightShadex | |
|---|---|---|
| Fly right now for ISK | Drake — HAM missions | Paladin — L4 missions |
| Fly right now for PvP | Hurricane or Vagabond | Loki |
| Fly right now for fleet | Rapier (tackle) | Guardian (logi) or Absolution (command) |
| One train away from | Sleipnir | Revelation dreadnought |
| Sec Status | −1.02 (can enter low-sec freely) | +2.34 (stays green) |
| Free SP | 256,033 — spend on Command Ships | 0 |
chronicbomb is based at Rens (Minmatar trade hub). xNightShadex is based at Amarr (Amarr trade hub). Everything below can be bought at either hub — or in bulk at Jita 4-4 which has the largest market in the game.
| Hub | Location | Best For |
|---|---|---|
| Jita 4-4 (Caldari Navy Assembly Plant) | The Forge region | Everything — biggest market, lowest prices |
| Rens (Brutor Tribe Treasury) | Heimatar region | Minmatar ammo, projectile modules — chronicbomb’s home |
| Amarr (Emperor Family Academy) | Domain region | Laser crystals, armour modules — xNightShadex’s home |
| Ammo Name | Search For | Use On | Range | Notes |
|---|---|---|---|---|
| Phased Plasma M | “Phased Plasma M” | Hurricane, Vagabond close range | 0–8 km | Best all-round brawling ammo. Thermal + kinetic damage. Buy 5,000 |
| EMP M | “EMP M” | Hurricane close range vs shields | 0–8 km | EM + kinetic damage. Use against shield-tanked targets. Buy 5,000 |
| Barrage M | “Barrage M” | Vagabond kiting, Hurricane falloff | 15–30 km | Lower damage but extended range. Your Vagabond default. Buy 10,000 |
| Republic Fleet EMP M | “Republic Fleet EMP M” | Hurricane or Loki high-value fights | 0–8 km | Faction ammo — more expensive but noticeably more damage. Buy 2,000 |
| Republic Fleet Phased Plasma M | “Republic Fleet Phased Plasma M” | Same as above | 0–8 km | Faction version — buy 2,000 for serious fights |
| Ammo Name | Search For | Use On | Against | Notes |
|---|---|---|---|---|
| Scourge Rage HAM | “Scourge Rage HAM” | Drake, any HAM ship | Angels, Serpentis | Your default. Kinetic damage, maximum DPS, short range |
| Inferno Rage HAM | “Inferno Rage HAM” | Drake | Guristas, Caldari | Thermal damage. Use against Caldari NPC factions |
| Caldari Navy Scourge HAM | “Caldari Navy Scourge HAM” | Drake — when you need range | Any | Longer range than Rage, less damage. Buy 1,000 |
| Mjolnir Rage HAM | “Mjolnir Rage HAM” | Drake | Blood Raiders, Sansha | EM damage for EM-weak enemies |
| Nova Rage HAM | “Nova Rage HAM” | Drake | Sansha, Blood Raiders | Explosive damage backup |
| Drone | Search For | Use On | Notes |
|---|---|---|---|
| Warrior II | “Warrior II” | Hurricane, Rapier, Vagabond | Fast light drones. Excellent tracking — kills frigates |
| Hobgoblin II | “Hobgoblin II” | Drake PvE | Slightly more DPS than Warriors, slower |
| Hammerhead II | “Hammerhead II” | Drake or Hurricane PvE | Medium drones — best all-round PvE choice |
| Crystal Name | Search For | Use On | Range | Notes |
|---|---|---|---|---|
| Scorch L | “Scorch L” | Paladin (Mega Pulse Laser II) | 50–70 km | Your PRIMARY crystal. Long range, excellent damage. Always have these loaded |
| Conflagration L | “Conflagration L” | Paladin close combat | 0–15 km | Maximum DPS at short range. Use when rats are right next to you |
| Imperial Navy Multifrequency L | “Imperial Navy Multifrequency L” | Paladin mid-range | 15–30 km | High damage, shorter range than Scorch. Good all-rounder |
| Imperial Navy Scorch L | “Imperial Navy Scorch L” | Paladin — best-in-slot long range | 50–70 km | Faction version of Scorch. Better damage. Buy when you can afford it |
| Scorch M | “Scorch M” | Absolution (Medium Pulse Laser II) | 35–50 km | Same as Scorch L but medium size for the Absolution |
| Conflagration M | “Conflagration M” | Absolution close range | 0–10 km | Maximum close-range DPS for the Absolution |
| Item | Search For | How Many to Buy | Notes |
|---|---|---|---|
| Navy Cap Booster 800 | “Navy Cap Booster 800” | 40–50 per mission run | Each click of the booster consumes one. Buy in bulk — they are heavy |
| Cap Booster 800 | “Cap Booster 800” | 20 as backup | Standard version, slightly less cap restored. Cheaper |
| Charge | Search For | Which Burst | Notes |
|---|---|---|---|
| Armor Reinforcement Charge | “Armor Reinforcement Charge” | Armor Command Burst I (slot 1) | Increases fleet armour resistances. Buy 20 |
| Armor Energising Charge | “Armor Energising Charge” | Armor Command Burst I (slot 2) | Increases fleet armour repair rate. Buy 20 |
| Item | Search For | How Many | Notes |
|---|---|---|---|
| Nanite Repair Paste | “Nanite Repair Paste” | 200–500 units | Each burst repair consumes roughly 8 paste. Buy in bulk |
| Drone | Ship | Use |
|---|---|---|
| Ogre II | Paladin | Heavy drones — maximum PvE DPS. Buy 5 + 5 spares |
| Warrior II | Loki | Fast light drones for PvP. Buy 5 |
| Hobgoblin II | Guardian (self-defence) | Buy 5 |
| Hammerhead II | Absolution | Medium drones for fleet DPS. Buy 5 + 5 spares |
| Item | Qty | Approx Cost |
|---|---|---|
| Phased Plasma M | 5,000 | ~500k ISK |
| EMP M | 5,000 | ~500k ISK |
| Barrage M | 10,000 | ~1.5m ISK |
| Republic Fleet EMP M | 2,000 | ~4m ISK |
| Scourge Rage HAM | 2,000 | ~3m ISK |
| Inferno Rage HAM | 1,000 | ~1.5m ISK |
| Caldari Navy Scourge HAM | 1,000 | ~2m ISK |
| Warrior II | 10 | ~500k ISK |
| Hobgoblin II | 10 | ~500k ISK |
| Total | ~14m ISK |
| Item | Qty | Approx Cost |
|---|---|---|
| Scorch L | 8 | ~3m ISK |
| Conflagration L | 8 | ~3m ISK |
| Imperial Navy Multifrequency L | 8 | ~2m ISK |
| Scorch M | 8 | ~1m ISK |
| Conflagration M | 8 | ~1m ISK |
| Navy Cap Booster 800 | 50 | ~5m ISK |
| Armor Reinforcement Charge | 30 | ~1m ISK |
| Armor Energising Charge | 30 | ~1m ISK |
| Nanite Repair Paste | 500 | ~5m ISK |
| Ogre II | 10 | ~5m ISK |
| Warrior II | 10 | ~500k ISK |
| Total | ~27m ISK |
| Ammo | Search For | Against |
|---|---|---|
| Scourge Heavy Missile | “Scourge Heavy Missile” | Default — Serpentis, mixed |
| Inferno Heavy Missile | “Inferno Heavy Missile” | Guristas, Caldari rats |
| Mjolnir Heavy Missile | “Mjolnir Heavy Missile” | Blood Raiders, Sansha |
| Nova Heavy Missile | “Nova Heavy Missile” | Angel Cartel |
| Ammo | Search For | Against |
|---|---|---|
| Scourge Rage HAM | “Scourge Rage HAM” | Default — maximum damage |
| Inferno Rage HAM | “Inferno Rage HAM” | Guristas |
| Mjolnir Rage HAM | “Mjolnir Rage HAM” | Blood Raiders / Sansha |
| Drone | Buy | Why |
|---|---|---|
| Hobgoblin I | 10 | Current drone — cheap, available now |
| Hobgoblin II | 10 | Upgrade when budget allows |
| Item | How to Get | Purpose |
|---|---|---|
| Minerals (Tritanium, Pyerite, etc.) | Mine ore → Reprocess, or buy directly from market | Raw material for all manufacturing |
| Blueprint Originals | NPC market → search item name → find NPC sell orders | Templates for manufacturing |
| Item | Search For | Why |
|---|---|---|
| Expanded Cargohold II | “Expanded Cargohold II” | Maximum cargo on the Iteron |
| Damage Control I | “Damage Control I” | Minimal tank — keeps her alive |
| Cargohold Optimization Rig | “Medium Cargohold Optimization I” | Cargo rigs — install once, permanent |
| Item | Qty | Cost |
|---|---|---|
| Scourge Heavy Missile | 2,000 | ~300k ISK |
| Inferno Heavy Missile | 2,000 | ~300k ISK |
| Mjolnir Heavy Missile | 2,000 | ~300k ISK |
| Nova Heavy Missile | 2,000 | ~300k ISK |
| Hobgoblin I | 10 | ~50k ISK |
| Ballistic Control System I | 2 | ~200k ISK |
| Total | ~1.5m ISK |
| Item | Qty | Cost |
|---|---|---|
| Expanded Cargohold II | 3 | ~2m ISK |
| Medium Cargohold Optimization I | 3 | ~1.5m ISK |
| Damage Control I | 1 | ~50k ISK |
| Tritanium (for manufacturing) | 500,000 units | ~3–5m ISK |
| Total | ~8m ISK |
| Screams Eternal | Lady Damnation | |
|---|---|---|
| ISK method | Combat sites, missions | Manufacturing, reprocessing |
| Requires being online | Yes — actively flying | No — jobs run offline |
| Scales with time | Linear — more hours = more ISK | Exponential — more jobs, more BPOs |
| Risk | Ship loss possible | Essentially zero risk |
| Starting cost | Low | Low (one BPO) |
| Skill ceiling | High — but takes time to train | Already at it — Industry 5 is done |
Hobgoblin II
| Mineral | Search For | Approx Cost per 100 drones |
|---|---|---|
| Tritanium | “Tritanium” | ~500k ISK |
| Pyerite | “Pyerite” | ~200k ISK |
| Mexallon | “Mexallon” | ~300k ISK |
| Isogen | “Isogen” | ~400k ISK |
| Nocxium | “Nocxium” | ~500k ISK |
| Zydrine | “Zydrine” | ~600k ISK |
| Megacyte | “Megacyte” | ~800k ISK |
| BPO to Buy Next | Why |
|---|---|
| Warrior II | Fast light drones — also high demand, same buyer pool |
| Scourge Heavy Missile | Missiles are consumed constantly — zero waste market |
| Hobgoblin I | Cheaper, faster to make, huge volume |
| Medium Shield Extender II | High-value module, slower turnover but bigger margin |
- Open the Agency (Alt+N) → Security Missions → find a level 2 agent near her current location
- Each mission takes 10–20 minutes and pays 500k–2m ISK in bounties and rewards