Frigates are cheap, fast to train, and where PvP begins. Lose one and it costs less than a night out. Master them and every other ship makes more sense.
Table of Contents
- Why Frigates
- Skills to Train First
- T1 Frigates — Starting Out
- T2 Assault Frigates — The Step Up
- T2 Interceptors — Speed Tackle
- Progression Path
- Universal Frigate Tactics
- What Each Character Should Fly
Why Frigates
Frigates are the foundation of PvP in EVE. Here is why they matter:
- Cheap — a fully fitted T1 frigate costs 5–15 million ISK. Losing one is irrelevant. This removes the fear of dying and lets you actually learn to fight
- Fast to train — a new character can be competitive in a T1 frigate in under a week
- Where PvP starts — every solo PvP pilot learned the basics in a frigate. The skills you learn here — managing range, applying damage, reading a fight — transfer directly to cruisers, battlecruisers, and beyond
- Always relevant — T2 frigates (Assault Frigates, Interceptors) are used in serious null-sec fleet operations alongside battleships and capitals. They never become obsolete
- They kill bigger ships — a skilled frigate pilot in an Assault Frigate can kill cruisers and even poorly-fitted battlecruisers
The mindset shift: In a frigate, dying is how you learn. Fit cheaply, undock, pick a fight, see what happens. Each loss teaches you something. Budget 100 million ISK for losses and treat each one as a lesson.
Skills to Train First
Train these before anything else. They make every frigate better regardless of race.
Universal Frigate Skills
| Skill | Train To | Why |
|---|---|---|
| Your Race Frigate (Minmatar/Caldari/Amarr/Gallente Frigate) | 5 | Each level adds a significant bonus to your ship’s performance |
| Spaceship Command | 4 | Agility and align time improvement |
| Navigation | 4 | Base speed increase |
| Afterburner | 4 | AB performance |
| Evasive Maneuvering | 4 | Faster align time — warps away quicker |
Tank Skills (pick one — shield OR armour based on your fit)
Shield tank: | Skill | Train To | Why | |—|—|—| | Shield Operation | 4 | Shield recharge rate | | Shield Upgrades | 4 | Shield extender fitting cost reduction | | Tactical Shield Manipulation | 4 | Prevents shield bleed into structure |
Armour tank: | Skill | Train To | Why | |—|—|—| | Hull Upgrades | 4 | Armour plate fitting cost | | Repair Systems | 4 | Armour repairer cycle | | Mechanics | 4 | Base armour HP |
Weapon Skills
Projectile (Minmatar): | Skill | Train To | |—|—| | Small Projectile Turret | 5 | | Gunnery | 4 | | Motion Prediction | 4 | | Rapid Firing | 4 | | Surgical Strike | 4 | | Small Autocannon Specialization | 3 |
Missile (Caldari): | Skill | Train To | |—|—| | Missile Launcher Operation | 5 | | Light Missiles | 4 | | Rockets | 4 | | Rapid Launch | 3 | | Target Navigation Prediction | 3 |
Energy (Amarr): | Skill | Train To | |—|—| | Small Energy Turret | 5 | | Gunnery | 4 | | Controlled Bursts | 4 | | Motion Prediction | 4 | | Small Pulse Laser Specialization | 3 |
Essential Support Skills
| Skill | Train To | Why |
|---|---|---|
| Warp Scrambler (Propulsion Jamming) | 3 | Hold targets — stops them warping away |
| Stasis Webifier | 1 (use T1) | Slow the target — improves your damage application |
| Power Grid Management | 4 | Fit more modules |
| CPU Management | 4 | Fit more modules |
| Weapon Upgrades | 4 | Reduces weapon fitting cost |
| Thermodynamics | 3 | Overheat modules in a critical moment |
T1 Frigates — Starting Out
T1 frigates cost almost nothing. Fit them cheaply and fight everything. The goal here is learning, not winning.
Rifter — Minmatar Brawler
Rifter — Minmatar T1 Frigate Three turrets, a utility high slot, fast — the classic entry PvP frigate
The Fit
[Rifter, T1 Brawler]

HIGH SLOTS
150mm Light AutoCannon II      x3   (or 125mm if CPU is tight)
Small Nosferatu I              (drains enemy cap, keeps yours topped up)

MID SLOTS
5MN Quad LiF Restrained Microwarpdrive
Warp Scrambler II
Stasis Webifier II

LOW SLOTS
200mm Rolled Tungsten Compact Plates
Damage Control II
Small Ancillary Armor Repairer  (load with Nanite Repair Paste)

RIGS
Small Projectile Collision Accelerator I
Small Trimark Armor Pump I     x2

DRONES
(no drone bay)

AMMO
Phased Plasma S    — default close range
EMP S              — vs shield ships
Barrage S          — if you need to kite at 10–15 km
What to Do
Before the fight: Load Phased Plasma S. Make sure your Ancillary Repairer has Nanite Repair Paste loaded.
- Burn at target with MWD active
- At 9 km activate Warp Scrambler — they cannot warp
- At 7 km activate Stasis Webifier — cuts their speed significantly
- Click Orbit → 500 m
- Activate all 3 autocannons
- Activate Nosferatu — drains their cap, helps yours
- When armour drops below 50%: activate Ancillary Armor Repairer — it fires multiple bursts rapidly
- Keep orbiting — never stop moving
Ammo swap: If target is pulling range past 10 km, switch to Barrage S — right-click launchers → Change Charges.
If you are losing: Overheat MWD (right-click → Overheat), burn away in a straight line, warp to any celestial.
What the Rifter Beats
- Other T1 frigates
- Rookie ships
- Poorly fitted destroyers (sometimes)
What Kills the Rifter
- Faster frigates that kite you at 15+ km
- Destroyers with good fits
- Anything with drones (drones shred frigate tank fast)
Kestrel — Caldari Missile Frigate
Kestrel — Caldari T1 Frigate 4 missile launchers, good range, easy to learn — ideal for Screams Eternal right now
The Fit
[Kestrel, Missile Kiter]

HIGH SLOTS
Light Missile Launcher II      x4

MID SLOTS
5MN Quad LiF Restrained Microwarpdrive
Warp Scrambler II
Medium Shield Extender II
Invulnerability Field II

LOW SLOTS
Ballistic Control System II    x2

RIGS
Small Core Defense Field Extender I   x2
Small Anti-EM Screen Reinforcer I

DRONES
(no drone bay)

AMMO
Scourge Light Missile    — default kinetic
Inferno Light Missile    — vs Gallente/Serpentis
Mjolnir Light Missile    — vs Amarr/Blood Raiders/Sansha
Nova Light Missile       — vs Minmatar/Angel Cartel
What to Do
The Kestrel is a kiting missile ship — keep your distance and let missiles do the work.
- Activate MWD immediately on landing
- Do NOT close to brawl — missiles have 40+ km range, use it
- When within 24 km of target: activate Warp Scrambler
- Click Orbit → 15,000 m — keep them at range
- Activate all 4 missile launchers
- Keep MWD running — speed is your defence
- If target closes to under 10 km: overheat MWD, burn away to reset range
Ammo: Always check what faction your enemy is before the fight and load the right missile type. This is the single biggest damage improvement available.
What the Kestrel Beats
- Slow brawlers that cannot close range
- Other T1 frigates at range
- NPC rats in missions (excellent mission frigate)
What Kills the Kestrel
- Faster frigates that get under your optimal range
- Anything with a web — if they web you, you cannot kite
- ECM (jams your lock — missiles cannot fire)
Merlin — Caldari Shield Brawler
Merlin — Caldari T1 Frigate Hybrid turrets, strong shield tank — tough and straightforward
The Fit
[Merlin, Shield Brawler]

HIGH SLOTS
Light Neutron Blaster II       x3

MID SLOTS
5MN Quad LiF Restrained Microwarpdrive
Warp Scrambler II
Stasis Webifier II
Small Shield Booster II

LOW SLOTS
Damage Control II
Magnetic Field Stabilizer II

RIGS
Small Core Defense Field Extender I
Small Anti-Thermal Screen Reinforcer I
Small Anti-EM Screen Reinforcer I

DRONES
(no drone bay)

AMMO
Void S     — max damage at 0–1 km (brawl)
Antimatter S — medium range 3–6 km
Null S     — kite range 10–15 km (less damage)
What to Do
Blasters require extremely close range — Void S works best at under 1 km. This is the most aggressive frigate fit in the game.
- MWD burn straight at target
- At 4 km: Warp Scrambler on
- At 2 km: Stasis Webifier on
- Click Orbit → 500 m — get as close as possible
- Activate all 3 blasters — load Void S for maximum damage
- Pulse the Shield Booster as needed — activate it when shield drops to 50%, let it cycle, turn off to save cap
- Watch your capacitor — the booster and MWD compete for cap. If cap runs dry, turn MWD off once you are in close
Pulsing the shield booster: Do NOT leave it running constantly — it drains cap fast. Turn it on when you need it, turn it off when you do not.
Incursus — Gallente Armour Brawler
Incursus — Gallente T1 Frigate Armour repairer bonuses, blasters, drone — tough little brawler
The Fit
[Incursus, Armour Brawler]

HIGH SLOTS
Light Neutron Blaster II       x3

MID SLOTS
5MN Quad LiF Restrained Microwarpdrive
Warp Scrambler II
Stasis Webifier II

LOW SLOTS
Small Ancillary Armor Repairer  (Nanite Repair Paste)
Damage Control II
Magnetic Field Stabilizer II

RIGS
Small Projectile Collision Accelerator I
Small Trimark Armor Pump I     x2

DRONES
Hobgoblin II  x1   (one drone — small drone bay)

AMMO
Void S     — brawl at 0–1 km
Antimatter S — medium range backup
What to Do
Almost identical to the Merlin but armour tanked. The bonus: the Incursus gets a significant repair amount bonus, making its Ancillary Armor Repairer hit harder than on any other T1 frigate.
- MWD straight at target
- Scrambler at 9 km, Web at 7 km
- Orbit 500 m, activate blasters
- Launch drone — send Hobgoblin at target
- When armour drops below 40%: activate Ancillary Repairer — the burst repairs rapidly
- After the paste runs out, the repairer goes into a long reload — that is when you need to decide: kill fast or warp out
T2 Assault Frigates — The Step Up
Assault Frigates require the racial frigate skill at 5 and Assault Frigates skill trained. They cost 50–150 million ISK fitted, deal significantly more damage than T1, and have much better tank. These are serious PvP ships used in real fleet operations.
Skill required to fly them: Assault Frigates I (requires racial Frigate V)
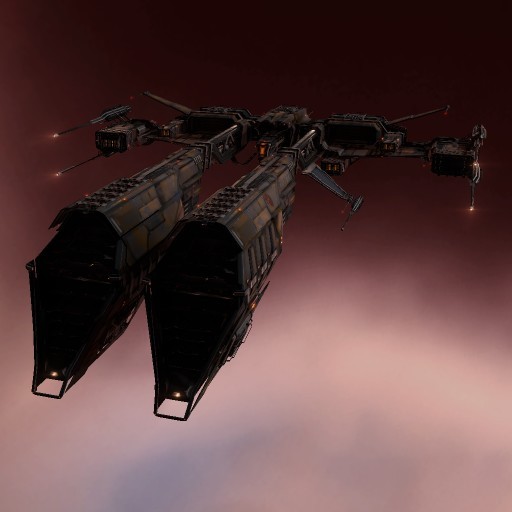
Wolf — Minmatar Assault Frigate
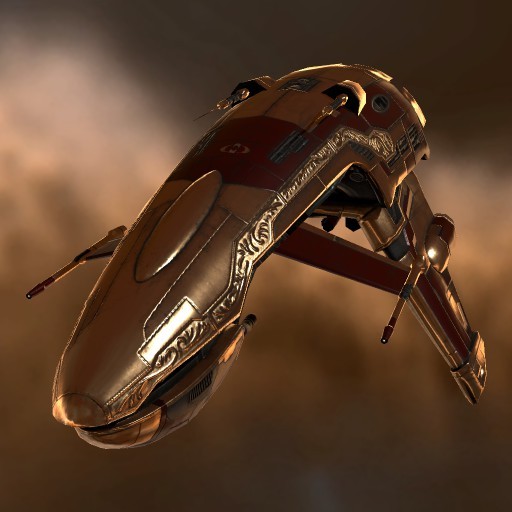
Wolf — Minmatar Assault Frigate (T2) chronicbomb and xNightShadex can both fly this now. Hard-hitting close-range brawler.
Who can fly it: chronicbomb (Assault Frigates IV), xNightShadex (Assault Frigates V)
The Wolf is the toughest Assault Frigate brawler in the game. It has a massive armour tank for its size and hits extremely hard at close range with autocannons. It cannot be kited easily — it is purely a close-range killer.
The Fit
[Wolf, Solo PvP Brawler]

HIGH SLOTS
200mm AutoCannon II            x4
Small Nosferatu II

MID SLOTS
5MN Quad LiF Restrained Microwarpdrive
Warp Scrambler II

LOW SLOTS
400mm Rolled Tungsten Compact Plates
Small Ancillary Armor Repairer  (Nanite Repair Paste)
Gyrostabilizer II
Damage Control II

RIGS
Small Projectile Collision Accelerator I
Small Trimark Armor Pump I     x2

DRONES
(no drone bay)

AMMO
Phased Plasma S    — your default, maximum close range DPS
EMP S              — vs shield-tanked targets
Barrage S          — if you need falloff at 10–15 km
Republic Fleet EMP S — faction ammo for serious fights, worth carrying 200 rounds
What to Do
The Wolf brawls at zero. It does not kite. It does not maintain distance. It gets on top of targets and deletes them.
Opening sequence:
- MWD on — burn at target full speed
- At 9 km: Warp Scrambler on
- At 3 km: Orbit 500 m
- All 4 autocannons active — load Phased Plasma S
- Nosferatu on target — drains their cap, refills yours
- Watch armour — activate Ancillary Repairer when below 50%
The Wolf’s advantage over a Rifter: Nearly double the armour HP, significantly more DPS. A Wolf can beat ships that would destroy a Rifter easily.
Dealing with kiting frigates: If something faster is pulling range and kiting you at 15+ km, switch to Barrage S and keep applying damage. The Wolf cannot catch a kiter — but Barrage lets you slowly wear them down while you wait for an opportunity to close.
Against cruisers and above: The Wolf can kill poorly-fitted cruisers if it can get under their guns. Orbit at 500 m — large turrets cannot track that fast. Apply Nosferatu to drain their cap. This only works if they have no drones.
Damage Output
With chronicbomb’s skills (Small Autocannon Spec IV, Surgical Strike V):
- Approximately 250–300 DPS at close range
- With Republic Fleet ammo: 280–330 DPS
Jaguar — Minmatar Assault Frigate
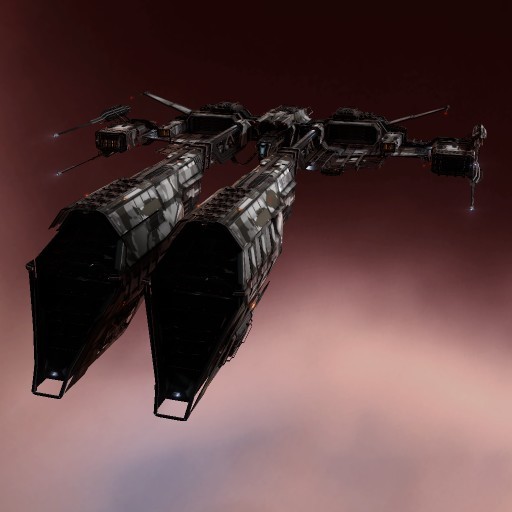
Jaguar — Minmatar Assault Frigate (T2) The faster, more flexible sibling of the Wolf. Can brawl or kite.
Who can fly it: chronicbomb (Assault Frigates IV), xNightShadex (Assault Frigates V)
The Jaguar is faster than the Wolf and has an extra mid slot, giving it more flexibility. It can brawl OR kite depending on the fit. This makes it better for solo roaming where you do not know what you will fight.
The Fit — Shield Kite
[Jaguar, Shield Kiter]

HIGH SLOTS
200mm AutoCannon II            x3
Small Nosferatu II

MID SLOTS
5MN Quad LiF Restrained Microwarpdrive
Warp Scrambler II
Stasis Webifier II
Medium Shield Extender II

LOW SLOTS
Gyrostabilizer II
Nanofiber Internal Structure II
Damage Control II

RIGS
Small Core Defense Field Extender I   x2
Small Projectile Collision Accelerator I

AMMO
Barrage S    — primary, kite at 15–20 km
EMP S        — swap in when they are webbed and stationary
What to Do — Kiting Mode
- MWD on — approach at angle, not head-on
- At 24 km: Warp Scrambler on
- At 10 km: Stasis Webifier on — cuts their speed
- Orbit 10,000–15,000 m with Barrage S loaded
- 3 autocannons firing at all times
- Keep MWD running — your speed is your tank
- If web lands and they are slow: switch to EMP S for more damage
Why kite with the Jaguar instead of brawl: The Jaguar’s speed lets it maintain range against most frigates. Brawling is riskier because the Jaguar has less armour than the Wolf. Using the extra mid slot for a web lets you control targets at range and apply damage safely.
Vengeance — Amarr Assault Frigate

Vengeance — Amarr Assault Frigate (T2) xNightShadex can fly this at Assault Frigates V. Rocket boat with a fortress tank.
Who can fly it: xNightShadex (Assault Frigates V, Amarr Frigate V)
The Vengeance is unique — it uses rockets (short-range missiles), not turrets. It has the best passive armour tank of any Assault Frigate in the game. It is extremely hard to kill and deals consistent DPS that cannot be reduced by tracking mechanics (missiles always apply full damage regardless of angular velocity).
The Fit
[Vengeance, Rocket Brawler]

HIGH SLOTS
Rocket Launcher II             x4

MID SLOTS
5MN Quad LiF Restrained Microwarpdrive
Warp Scrambler II
Stasis Webifier II

LOW SLOTS
400mm Rolled Tungsten Compact Plates
Energized Adaptive Nano Membrane II
Damage Control II
Small Ancillary Armor Repairer  (Nanite Repair Paste)

RIGS
Small Trimark Armor Pump I     x3

DRONES
(no drone bay)

AMMO
Caldari Navy Scourge Rocket    — your primary (kinetic/thermal damage)
Caldari Navy Inferno Rocket    — thermal damage variant
Pith X-Type rockets            — faction ammo when you want maximum DPS
What to Do
- MWD straight at target
- Scrambler at 9 km, Web at 7 km
- Orbit 500 m — rockets work best at close range
- All 4 rocket launchers active
- Ancillary repairer when armour dips below 40%
The Vengeance’s superpower: Its passive armour tank is so strong it can sustain incoming damage that would kill other frigates instantly. You can fight multiple T1 frigates simultaneously. You are the anvil — they break against you.
Missiles vs turrets: Unlike the Wolf, the Vengeance’s rockets apply full damage regardless of how fast the target is moving. You do not need to worry about tracking. This makes it excellent against fast frigates that would make turret tracking difficult.
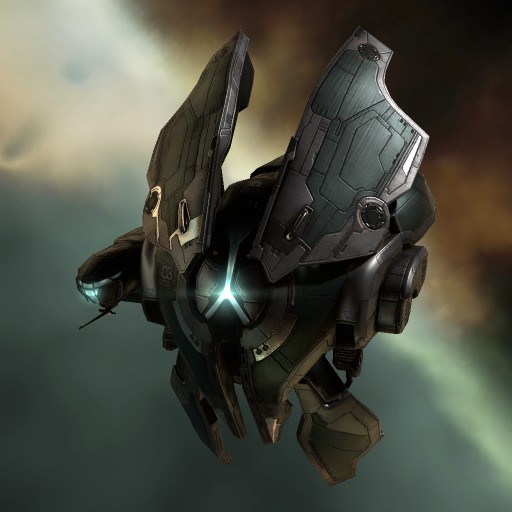
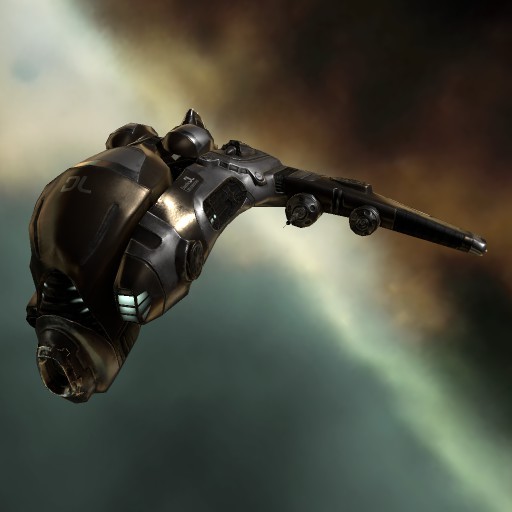
Hawk — Caldari Assault Frigate

Hawk — Caldari Assault Frigate (T2) Screams Eternal’s next step. Heavy Assault Missiles on a tiny, tanky ship.
Who can fly it: Screams Eternal needs Assault Frigates I + Caldari Frigate V (currently at IV — one level away)
The Hawk fires Heavy Assault Missiles from a frigate-sized hull. It hits hard, tanks well, and applies damage at ranges where most frigates cannot. Think of it as a small Drake.
Skills Screams Eternal Needs
- Caldari Frigate V — she is at IV, needs one more level (~8 days)
- Assault Frigates I — then she can enter the Hawk
- Heavy Assault Missiles — her next priority train ✅ (already recommended)
The Fit
[Hawk, HAM Brawler]

HIGH SLOTS
Heavy Assault Missile Launcher II  x4

MID SLOTS
5MN Quad LiF Restrained Microwarpdrive
Warp Scrambler II
Medium Shield Extender II
Invulnerability Field II

LOW SLOTS
Ballistic Control System II    x2
Damage Control II

RIGS
Small Core Defense Field Extender I   x2
Small Anti-EM Screen Reinforcer I

AMMO
Scourge Rage HAM    — maximum damage, kinetic
Inferno Rage HAM    — thermal, vs Gallente/Serpentis
What to Do
- MWD at target until within 24 km — scrambler range
- Scrambler on, then orbit 7,000 m — HAMs hit best at 5–10 km
- All 4 HAM launchers firing
- Keep MWD on — maintain orbit, stay at HAM optimal range
- HAMs have a 4 second travel time — do not waste shots on targets moving away fast
T2 Interceptors — Speed Tackle
Interceptors are not gunships — they are tackle ships. Their job is to be so fast that nothing can escape them, catch a target with a warp disruptor, and hold it in place until the fleet arrives. They are immune to warp disruption bubbles in null-sec (Interdiction Nullification), making them the only ships that can move freely through bubble camps.
Required skills: Interceptors I (requires racial Frigate V + Spaceship Command V)
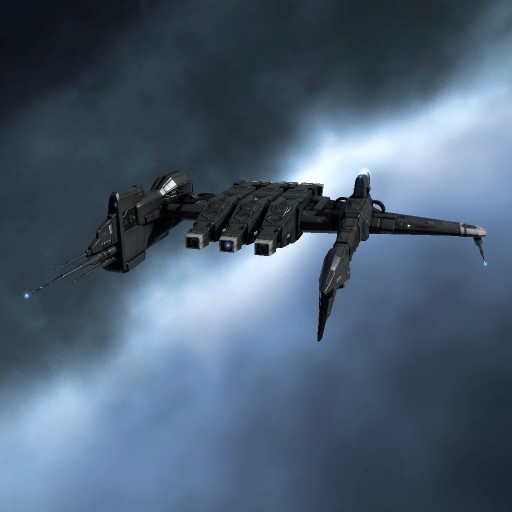
Stiletto — Minmatar Interceptor

Stiletto — Minmatar Interceptor (T2) chronicbomb has Interceptors III — she can fly this now.
Who can fly it: chronicbomb (Interceptors III)
The Stiletto is the fastest tackle ship in Minmatar space. It reaches speeds of 5,000+ m/s with MWD — nothing outruns it. Its purpose is to catch targets, hold them with a long point (Warp Disruptor), and call for backup.
The Fit
[Stiletto, Long Point Tackle]

HIGH SLOTS
125mm Gatling AutoCannon II    x2   (light guns — not your main job)

MID SLOTS
5MN Quad LiF Restrained Microwarpdrive
Warp Disruptor II              (24 km range — long point, NOT a scrambler)
Stasis Webifier II

LOW SLOTS
Nanofiber Internal Structure II  x2
Damage Control II

RIGS
Small Low Friction Nozzle Joints I   x2
Small Auxiliary Thrusters I

DRONES
(no drone bay)

AMMO
Barrage S    — fires while maintaining tackle at range
What to Do
The Stiletto’s job is tackle — not damage. Your guns are an afterthought.
- MWD on — you are flying at 5,000+ m/s
- Approach target and activate Warp Disruptor at 20+ km — long point, keeps them 24 km or closer
- Orbit at 15,000 m — stay at the edge of your point range
- Web the target to slow their escape attempts
- Fire autocannons while orbiting — minimal damage but contributes
- Call tackle on comms: “Point on [ship type], [your location]”
- Keep the point active until your fleet arrives and kills it
The most important rule: Do NOT get within scrambler range of most ships. A battlecruiser or cruiser with a web and guns will kill you if you are within 10 km. Stay at 15–20 km, keep the long point active, let the fleet do the killing.
Bubble immunity: In null-sec, the Stiletto cannot be caught by warp disruption bubbles. You can warp freely through interdiction fields that stop every other ship. This makes you invaluable as a scout and tackle pilot in null-sec operations.
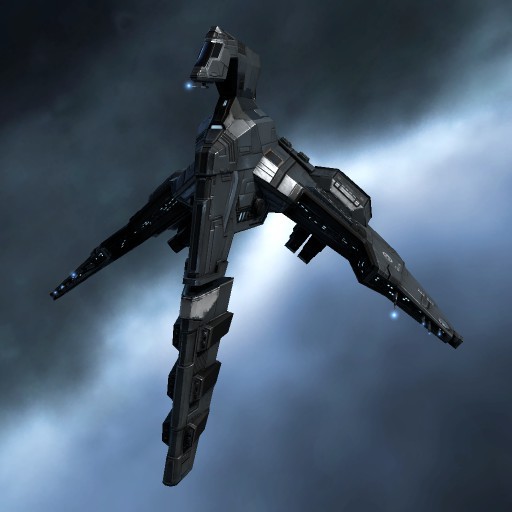
Crusader — Amarr Interceptor
Crusader — Amarr Interceptor (T2) xNightShadex has Interceptors IV — near maximum effectiveness.
Who can fly it: xNightShadex (Interceptors IV, Amarr Frigate V)
The Crusader is an attack interceptor — faster and more focused on damage than tackle interceptors like the Stiletto. It uses small pulse lasers and deals surprising DPS for its size, while still being fast enough to catch almost anything.
The Fit
[Crusader, Attack Interceptor]

HIGH SLOTS
Small Focused Pulse Laser II   x4

MID SLOTS
5MN Quad LiF Restrained Microwarpdrive
Warp Scrambler II

LOW SLOTS
Heat Sink II                   x2
Nanofiber Internal Structure II
Damage Control II

RIGS
Small Energy Locus Coordinator I
Small Auxiliary Thrusters I    x2

AMMO
Conflagration S    — close range, maximum DPS
Scorch S           — medium range if needed
What to Do
- MWD on — approach at full speed
- Scrambler at 9 km — prevents MWD use on target, stops warp
- Orbit 1,000 m — very tight orbit, hard to track
- All 4 pulse lasers firing with Conflagration S loaded
- Speed is your tank — keep orbiting, never stop
Attack vs tackle interceptor: The Crusader deals real DPS and can kill T1 frigates solo. The Stiletto is purely about holding things alive for the fleet. Which one to fly depends on whether you are going solo or fleet.
Progression Path — Start to T2
Follow this path in order:
WEEK 1–2
Train racial Frigate to IV
Train basic gunnery/missile skills to III–IV
Fly T1 frigates — Rifter, Kestrel, Merlin
Goal: understand range control and basic fitting

WEEK 3–4
Train racial Frigate to V
Train weapon specialization skills to III
Fly better-fit T1 frigates — start winning some fights
Goal: learn to read a fight — when to stay, when to run

MONTH 2
Train Assault Frigates I → III
Fly Wolf or Jaguar (Minmatar), Hawk (Caldari), Vengeance (Amarr)
Goal: consistent wins against T1 frigates, start fighting T2

MONTH 3+
Train Assault Frigates IV → V
Train Interceptors I → III
Fly Interceptors for fleet tackle
Goal: join serious fleet operations as tackle
Universal Frigate Tactics
These rules apply to every frigate regardless of race or fit.
The Four Ranges
Every fight has a range that suits your ship. Know yours before you undock.
| Range | Best For | Avoid If You Are |
|---|---|---|
| 0–3 km | Blasters, brawl autocannons | A kite ship |
| 3–10 km | Autocannons, short rockets | Anything |
| 10–20 km | Barrage, light missiles | A brawl ship |
| 20–30 km | Light missiles, long range | Close range |
Transversal — The Most Important Concept
Transversal velocity is how fast you are moving across an enemy’s field of view. High transversal = hard to hit with turrets. Low transversal = easy to hit.
- Orbiting creates transversal — you are moving sideways relative to the target. Turrets struggle to track you.
- Flying straight at a target or straight away = zero transversal = you get hit at full damage. Never do this.
- The tighter the orbit, the more transversal. 500 m orbit = very hard to track. 10 km orbit = easier to track.
Practical rule: Always orbit. Never approach or flee in a straight line.
Overheating
Right-click any module → Overheat. This temporarily boosts its performance at the cost of heat damage to nearby modules. Use it when:
- You need one final burst of MWD speed to escape
- Your ancillary repairer needs to fire faster in a desperate moment
- You want extra range on your scrambler to catch a fleeing target
Stop overheating before the module burns out — watch the heat bar. Use Nanite Repair Paste to fix heat damage between fights.
The Escape Rule
If you are losing and cannot win, warp out. There is no shame in it. A frigate that warps out lives to fight again. A frigate that stays and dies is gone. You learn more from surviving a bad fight and understanding what went wrong than from going down on principle.
How to escape:
- Overheat MWD
- Burn in a straight line away from everything
- As soon as you are outside scrambler range (9 km) and disruptor range (24 km): warp to any celestial
- If you cannot align to warp, burn perpendicular to the enemy — this puts angular velocity between you and their guns
What Each Character Should Fly
chronicbomb
| Ship | Status | Focus |
|---|---|---|
| Wolf | Fly now — Assault Frigates IV | Solo PvP brawler |
| Jaguar | Fly now | Roaming kite/flex |
| Stiletto | Fly now — Interceptors III | Fleet tackle |
| Rifter | Skip — she is past T1 | — |
Recommendation: Get in a Wolf for solo fights. Get in a Stiletto when joining a fleet as tackle. These are her best frigate options at current skills.
xNightShadex
| Ship | Status | Focus |
|---|---|---|
| Wolf | Fly now — Assault Frigates V | Brawler |
| Jaguar | Fly now | Flex |
| Vengeance | Fly now — Amarr Frigate V + AF V | Rocket brawler |
| Retribution | Fly now | Laser brawler |
| Crusader | Fly now — Interceptors IV | Attack interceptor |
| Malediction | Fly now | Tackle interceptor |
Recommendation: The Vengeance is his best solo frigate — rockets apply perfectly regardless of target speed, and the tank is exceptional. For fleet: the Crusader as attack interceptor.
Screams Eternal
| Ship | Status | Focus |
|---|---|---|
| Kestrel | Fly now | Missile kiter — learn the basics here |
| Merlin | Fly now | Shield brawler alternative |
| Hawk | Train Caldari Frigate V first (~8 days) | HAM assault frigate |
Recommendation: Fly the Kestrel now to learn range control and missile mechanics. Train Caldari Frigate V immediately — the Hawk is a massive upgrade and she is one skill level away.
Lady Damnation
Lady Damnation is not a combat pilot and should not be flying frigates into fights. Her Gallente Frigate III is enough to fly hauler support ships. Keep her in the Iteron doing industry.
Last updated April 2026 · Ship images via images.evetech.net (CCP official CDN) · Character Profiles · Back to Guide